Dormer Loft Conversion Cost
Last updated 25th February, 2025
The average dormer loft conversion costs around £30,000 in the UK. This would be the approximate price if it added between 20 – 30 square meters of liveable space.
However, the cost of a dormer loft conversion will vary depending on the type of dormer conversion you want, the size of the loft extension, the quality of the finish, and your location in the UK.
In this guide, we cover everything you need to know about dormer loft conversion costs. We compare the prices of different types of dormer extensions, detail the cost of a loft conversion per square metre, include a loft conversion cost calculator, and much more.
Let's get started below!
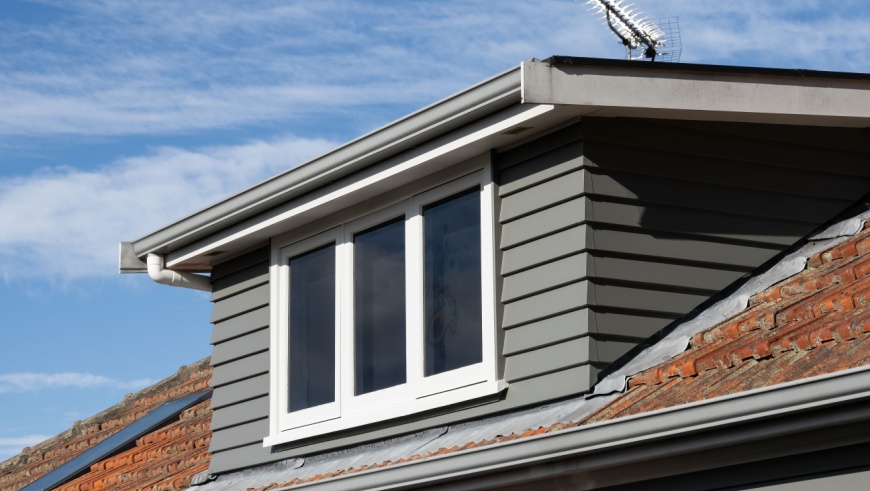
Table of Contents
- How much is a dormer loft conversion?
- Labour costs and time frames
- What does building a dormer loft conversion involve?
- What impacts dormer loft conversion costs?
- Can I build a dormer loft conversion myself?
- Can my dormer loft be converted?
- Types of dormer loft conversions
- Planning your dormer loft conversion
- Do I need an architect?
- Loft conversion staircase costs
- Lighting costs
- Heating and insulating costs
- Ventilation costs
- The cost of a dormer loft conversion with a bathroom
- Fire safety
- Reasons for a dormer loft conversion
- Benefits of a dormer loft conversion
- Will a dormer loft conversion add value to my home?
- Planning permission for loft conversions
- Building regulations for loft conversions
- How to reduce dormer loft conversion costs
- Cost of dormer Loft conversion removal
- FAQs
- Finding a dormer loft conversion specialist
- Sources
How Much is a Dormer Loft Conversion?
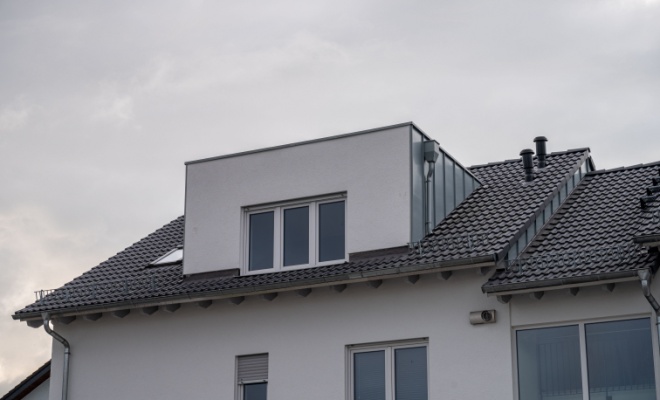
Dormer loft conversions are the most common type of loft extension that you'll see around the UK. They have a small flat-roofed extension with one or more windows.
The average dormer loft conversion cost in the UK is between £12,000 – £48,000 in 2024. However, a significant amount of the total cost of a loft conversion depends on the amount of space you're looking to convert.
Here's a breakdown of how much a dormer loft conversion costs for compact, small, medium, and large spaces:
| Size of Conversion | Estimated Cost |
|---|---|
| Compact Dormer Loft Conversion (10m²) | £8,500 – £13,500 |
| Small Dormer Loft Conversion (20m²) | £17,000 – £27,000 |
| Medium Dormer Loft Conversion (30m²) | £26,000 – £40,000 |
| Large Dormer Loft Conversion (40m²) | £34,500 – £55,000 |
As this shows, a small dormer loft conversions costs between £17,000 – £27,000, while you'd be quoted around £26,000 – £40,000 for a medium-sized conversion. The most popular size of a dormer loft conversion in the UK is between 20m² – 30m² (i.e., between small and medium).
A larger-scale dormer loft conversion costs anywhere between £34,500 – £55,000. But if all you're after is a little extra space, then you could convert around 10m² of your attic for around £8,500 – £13,500.
The exact cost will depend on the type of dormer installation, as well as other customisations (e.g., roof type, en-suite conversion, etc.). These cost variations are due to the different materials needed and the additional time that’s required for the tradesmen to complete these additions.
The most common applications include:
Recessed dormer (£1,300 – £1,850)
Blind dormer (£3,200 – £4,400)
Barrel roof dormer (£3,000 – £4,600)
Hipped roof dormer (£5,600 – £6,660)
Gable dormer (£5,500 – £7,500)
Pedimented roof dormer (£12,700 – £23,100)
Flat roof dormer (£13,800 – £21,600)
Before we move on, a quick note:
This guide focuses on the costs of a dormer loft conversion in the UK, but there are other types of loft conversions that you could consider.
The average cost of a loft conversion is between £15,000 – £45,000.
Velux loft conversions tend to be on the lower-end of this range, typically around £20,000, as they don't involve as much modification as other types of loft conversions. Mansard loft conversions cost typically cost around £50,000, as they require more significant work to your roof (which also requires planning permission).
Dormer Loft Conversion Prices
Below are some estimated costs of a dormer loft conversion.
| Job Description | Avg. Cost | Avg. Duration |
|---|---|---|
| Fit a small flat-roofed dormer with uPVC window | £4,000 | 5 Weeks |
| As above - with a pitched roof | £5,000 | 5 Weeks |
| Typical double dormer full loft conversion | £30,000 | 8 Weeks |
| Large double bedroom dormer conversion with en-suite | £40,000 | 10 Weeks |
Dormer Loft Conversion Cost Per Square Metre
Below we explain the cost per square metre for different types of dormer loft conversions:
| Type of dormer loft | Avg. Cost |
|---|---|
| Recessed dormer | £750 per m² |
| Blind dormer | £862 per m² |
| Barrel roof dormer | £1,076 per m² |
| Hipped roof dormer | £1,237 per m² |
| Gable dormer | £1,291 per m² |
| Flat roof dormer | £1,345 per m² |
| Pedimented roof dormer | £1,776 per m² |
Additional Dormer Loft Conversion Costs
The table below lists some of the most common additional costs you'll face when getting a loft conversion. The most significant expense here is if you need to have roof modifications to accommodate the addition of a dormer.
| Job | Avg. Cost |
|---|---|
| Moving the water tank | £300 – £800 |
| Replacing roof trusses | £12 – £40 per m² |
| Roof modifications | £11,500 – £15,380 |
| Ventilation | £250 – £400 |
| Underfloor heating | £20 – £30 per m² |
| Scaffolding | £11 – £40 a day |
Supply Only Cost
In this section, we detail the individual costs of common materials that you might need to buy when having your loft converted.
Bathroom
Sink (£60 – £150)
Toilet (£50 – £200)
Bath (£80 – £200)
Shower (£50 – £280)
Flooring
Tiles (£20 per m²)
Carpet (£60 per m²)
Laminate (£10 per m²)
Wood (£50 per m²)
Walls
Wallpaper (£5 – £100 per roll)
Paint (£5 – £15 per litre)
Plaster (£85 per m²)
Timber (£0.60 – £1 per board)
Staircase
Pine (£400 – £500)
Softwood (£400 – £600)
Oak (£1000 – £1700)
Metal (£1200 – £1500)
Lighting
Freestanding Lamps (£30 – £120)
Ceiling lights (£40 – £200)
Wall lights (£15 – £60)
Smart lighting (£25 – £500)
Windows
Double-glazed (£300 per window)
Triple-glazed (£400 per window)
Skylights (£350 per window)
Doors
Timber (£50)
Aluminium (£90)
Glass (£100)
PVC (£200)
Electrics
Light switches (£2 each)
Power sockets (£6 each)
Cables (£13.50 each)
Heating
Gas boiler (£900 – £1800)
Electric radiators (£200 – £500)
Underfloor heating (£20 – £30 per m²)
Dormer Conversion Cost Breakdown Calculator
Individual costs of a small dormer loft conversion (flat-roofed).
Total Cost: £4,000
Materials
£1000
Tradesmen
£3000
Waste Removal
£0
Labour Costs and Time Frames
Due to the long-term nature of the work being completed, the average cost of labour will be higher than usual, but tradesmen may charge a lower daily rate due to the long timescales involved. For example, a discounted daily rate could be around £120 - for 5 workdays each week for 5 weeks (for a small dormer installation) - this could still cost around £3,000 for the time and labour alone.
You will also need to consider the costs of each contractor. Here is a breakdown of the different labourers, how much they charge and the duration of each job.
| Tradesman | Avg. Cost Per Hour | Duration |
|---|---|---|
| Builder | £65 | 4 – 6 weeks |
| Plumber | £55 | 2 – 4 days |
| Electrician | £50 | 3 – 7 days |
| Plasterer | £40 | 1 – 2 days |
| Joiner | £12 | 1 – 2 weeks |
| Structural engineer | £50 | 2 – 4 Days |
| Architect | £60 | 1 – 3 Days |
| Glazier | £16 | 1 – 5 hours |
| Roofer | £50 | 1 – 2 weeks |
The above time frames may vary depending on the size and quality of the dormer loft conversion. For example, a basic dormer window installation may only take around 3 weeks, while a larger dormer loft conversion with a bedroom and bathroom could take anywhere from 6 – 8 weeks.
What Does Building a Dormer Loft Conversion Involve?
There are several steps involved when installing a dormer loft conversion, including:
Planning and Design
The first step is to find out if you need planning permission to build a dormer loft conversion. The majority of loft conversions fall within the permitted development rights. However, you may be restricted if your home is classified as a listed building or your dormer exceeds the legal limitations.
If you do require planning permission, you must apply before any construction begins. It is also important to obtain building control approval before building your dormer loft, as this will prevent you from any fines or wasted time.
To ensure you meet building regulations, you can seek help from professional architects and structural engineers who can design a foolproof plan for your dormer loft which will prevent legal issues and could also increase your return on investment. This will include detailed drawings of headroom, stair design, electricals, insulation, fire safety, and even soundproofing. They will also work with other tradesmen to ensure that everything is done properly.
Building
Once the plans are in place, the building can commence. The first trip is to erect the scaffolding around the area being converted. A roofer will then remove sections of the roofing tiles to accommodate the dormer structure. Steel supports are then hoisted onto the roof then bolted together to construct a solid steel frame across the loft and above the ridge of the roof.
Once the internal structure is in place, joists will then be positioned along with boards which form the base of the roof. The frame and boards will then be bolted on each side both inside and outside of the property. The front boarding will then be measured and fixed accordingly, making sure to accommodate for windows and doors.
To protect the dormer from water damage, a waterproof membrane will be installed along with lead strips which act as a barrier against rainwater.
Roof Structure Modifications
If your roof is not the right pitch or size, then changes must be made to comply with building regulations. If you have a truss roof, it will be easier to remove and raise. A typical roof raise involves the removal of the existing roof, which is then replaced with a higher roof.
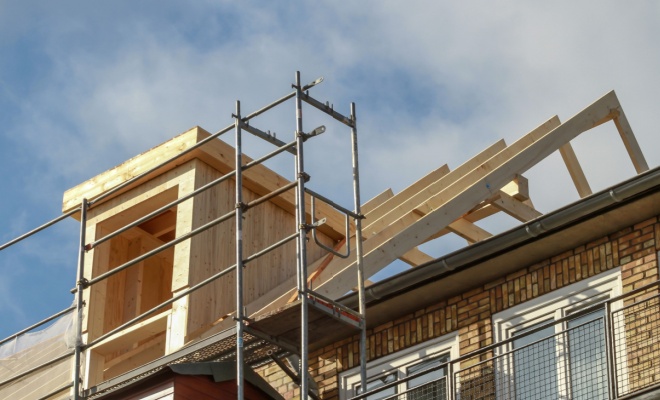
If raising the roof is not possible, then you may be able to higher the ceiling in the room below. This will involve bolting a plate to the wall with shield anchors to make room for the new floor joists.
Other modifications include rafter strengthening, which involves adding more supports to ensure your loft conversion is stable. A trussed roof will also have to be strengthened with steel beams inserted between loadbearing walls to prevent any damage or potential caving.
Insulation
There are two ways to insulate the roof, the first being the cold roof method which requires 70mm slab foam insulation to be installed between the rafters, making sure there is 50mm space between the roof material and the insulation. 30mm of additional insulation should then be added to the inside of the rafters for a total of 100mm of insulation.
Warm roof loft insulation involves 100mm of Celotex insulation covering the rafters. This is then secured with a covering capping, tile battens and tiles. This is a common application for a flat roof dormer, although it does not tend to work with other applications.
If you live in an attached or semi-detached home it may be necessary to insulate party walls to tackle noise and heat reduction. This will involve mineral fibre insulation combined with timber stud work which can be attached to sound-rated plasterboard. To insulate the floor, mineral fibre insulation and a denser sound insulation quilt should be laid between joists.
Electrics
The electrician you hire will start by installing first fix electrical work which could involve installing a temporary consumer unit for the site, followed by fitting an earth rod, carcass wiring and backboxes. They may also need to cross bond and earth the plumbing pipework.
Wiring should then be installed into walls, making sure there is a 150mm tolerance for each cable. Once these are fitted, the walls will be plastered and more wiring will be put in place for the permanent consumer unit, as well as installing lighting, power sockets, security systems, and more. Tests will then be completed to ensure the safety of all electrical installations.
Lighting
Dormer lofts are usually sloped, so the right lights must be chosen and fitted properly. The most common choices include track lighting and downlights, which are usually installed on a flat ceiling or inside a dormer window.
To enhance natural light, an electrician or roofer may install roof lights by removing the tiles and battens. The roof rafters will then be cut to make room for the roof light, which will then be framed and flashings will be added to secure it.
Windows and Doors
Adding a dormer window to your loft conversion involves opening up the roof to install the right size timbers. They may be cut to size off-site for quicker installation and better weatherproofing.
To meet fire safety regulations, you will need to have a fire door installed at the top or bottom of the new stairs. This door should provide 20 minutes of fire resistance and must not be glazed to comply with the rules. This should be fitted by a fully-trained individual.
Staircase
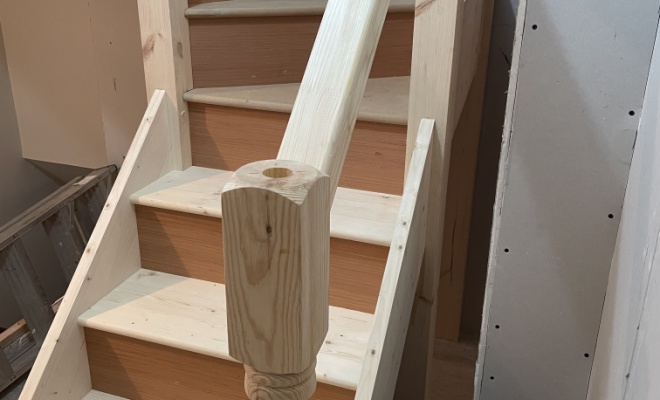
To access the loft, you will need an adequate staircase fitted. This will involve installing a staircase on line with the roof ridge to make the most of the space. It is vital that the minimum height remains at least 1.8m to the side of the stairs, 1.9m in the centre and 2m above the pitch line. The stairs must not exceed 16 steps, although the most common application is 13 steps in a dormer loft.
To fit the stairs, part of the landing ceiling will need to measured and cut to accommodate the fixture. The corner steps should then be fitted on the level below and then connected to the main staircase. This will be bolted together and hoisted into place, making sure it is leading to the right spot in the dormer.
Plumbing
If you're adding a bathroom to a dormer loft conversion, then you will need to bring in a plumber. The first thing they will do is located the existing facilities which can be used to power the new toilet, sink and bath/shower. Soil pipes must be connected, which is easily done in homes where pipes are fitted at roof level, although it may be possible to connect pipes on the floor below also.
When fitting a shower and toilet, you must measure the headroom before installation. You may also want to consider installing your bath by tucking it under attic eaves to create more space. Wall-mounted installations are also great space-saving options, especially in a smaller loft conversion.
Heating
When adding a dormer loft, you may need to update the boiler, especially if you are having a bathroom fitted. When installing a new boiler, a qualified plumber will more than likely place it in the space of the existing boiler to avoid any changes or complications.
You may also want to have radiators fitted. To do this, all existing radiators must first be disconnected then the area must be scoped to find the best to install the radiator. Popular options include under windows; however, this may not generate heat throughout the entire room, especially in larger conversions.
If you are installing a large dormer extension, then you may consider underfloor heating installation, which is especially effective in bathrooms. You can choose either a wet or dry system. For the first option, pipes will be laid out to cover the entire floor area, and the manifold should be placed on the floor to ensure the plumbing connection is easy.
An electric system will involve sticking electric mats to the floor, and attaching a floor sensor below a wall thermostat to help monitor usage. In both applications, the screed will be applied to the floor, which insulates and increases heat flow.
Flooring
When laying the flooring in a loft, it is important to measure the area and use part of the flooring as a template before sticking it down, as some pieces may need to be cut to fit properly.
Before laying down the floor, an underlayment will be installed, which will act as a thermal and noise barrier. Once the underlay is in place, it should be secured with tape on the seams.
The actual flooring itself should then be placed down spacers which will help to achieve at least a ¼ inch gap. The floor should be laid out from left to right and once complete a rubber mallet should be used to join the flooring together while keeping the seams and joints are tight with no caps. Once complete, the mouldings and trim will then be added to the edges of the floor.
Plastering
Plasterboards should be placed on each wall and bolted into place. This will then be followed by the application of adhesive, which is one of the most important layers as it will ensure the plaster dries evenly.
The plaster itself should be mixed into cold water and should only be applied when it has a custard-like consistency. The plaster will then be painted onto walls in an upwards motion. After the first coat has been laid on, it can be smoothed over after 20 minutes of drying time. The surface can then be scraped, and the process begins again.
To finish off, a small amount of water is applied to the surface; then a trowel is used to smoothen out the area. To ensure there is no excess plaster, sandpaper can be used to remove any unnecessary debris.
Painting and Decorating
Once all walls have been plastered, decorating can commence. If the design involves painting the walls, this can be completed by a professional painter and decorator or by yourself. To ensure a clean paint job, the walls will be thoroughly cleaned with a sponge and clean water to remove all dust and debris.
Primer should then be used to prepare the wall; then once this is dry, the chosen paint will then be applied carefully, making sure to let it dry between coats.
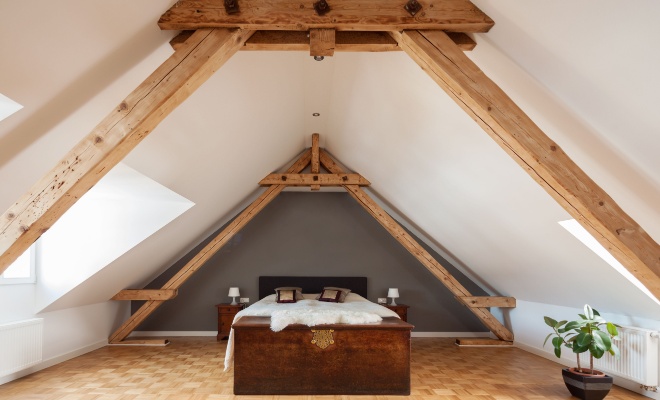
Hanging wallpaper is slightly more complicated and may take longer. This involves measuring and cutting the wallpaper to size then pasting it onto the wall with adhesive, making sure that everything fits perfectly with no creases or bumps.
What Impacts Dormer Loft Conversion Costs?
A dormer loft conversion is a huge job so there are a lot of factors which will change the overall cost you pay for the work.
Below we have split up all the factors which will change the price and give an indication of what you can expect the cost to be.
Type of Dormer Loft Conversion
Dormer window conversion (£3,000)
Bathroom dormer loft (£17,000)
Double bedroom dormer loft (£30,000)
Double bedroom dormer loft with en-suite (£40,000)
Size
Small dormer – 4 x 5 metres with 1 dormer and 1 roof light (£31,000)
Medium dormer – 6 x 5 metres with 1 dormer and 1 roof light (£40,000)
Large dormer – 12 x 8 metres with 1 dormer and 1 roof light (£58,000)
Quality
Basic (£10,000)
Good (£30,000)
Excellent (£60,000)
Labour
-
Joiner (£12 per hour)
-
Glazier (£16 per hour)
-
Plasterer (£40 per hour)
-
Electrician (£50 per hour)
-
Roofer (£50 per hour)
-
Structural engineer (£50 per hour)
-
Plumber (£55 per hour)
-
Builder (£65 per hour)
-
Architect (£60 per hour)
Legal
Party wall agreement (£300)
-
Planning permission (£206 – £462)
Building Fixtures
-
Roof modifications (£11,500 – £15,380)
-
Foundations (£3,000 – £10,000)
-
Plastering (£2,000 – £7,000)
Insulation
-
Exterior insulation (£80 per m²)
-
Cold deck insulation (£35 per m²)
-
Warm deck insulation (£40 per m²)
-
Floor insulation (£3 – £20 per m²)
-
Wall insulation (£100 per m²)
Plumbing
-
Pipes (£4 per m²)
-
Toilet (£170 – £325)
-
Sink (£160 – £420)
-
Bath (£300 – £1,000)
-
Shower (£200 – £900)
Heating
-
Electric heating system (£50 – £100)
-
Gas heating system (£2,000 – £3,000)
-
Underfloor heating (£64 – £170 per m²)
Electrics
-
Lighting (£4 – £25 per bulb)
-
Wiring (£410 – £1,600)
-
Plug sockets (£50 – £300)
External F inishing
-
External waterproof membrane (£290 – £1,200)
-
Steel flashing (£170 – £900)
-
Roof tiles (£1,050 – £700 per m²)
Internal Finishing
-
Wallpaper (£115 – £760)
-
Paint (£150 – £615)
-
Carpet (£13 – £50 per m²)
-
Floor (£15 – £60 per m²)
Extras
-
Appliances (£1,000 – £3,000)
-
Landscaping (£100 – £800)
-
Clean-up (£3 – £5 per m²)
Can I Build a Dormer Loft Conversion Myself?
Any loft conversion is a major job and beyond the scope of the typical DIY enthusiast. You will need a builder to construct the walls and install insulation and soundproofing.
A glazier for the new windows, an electrician for lighting and new sockets for electrical equipment, and a plumber for additional radiators and perhaps to fit a bigger boiler to cope with extra heating demands. A joiner may be required for new ceiling joists, and a plasterer will be needed for the new walls.
A painter and decorator will also come in handy, although this is one part of the loft conversion which most of us can tackle to save some cash. If you plan to tackle the painting or wallpapering yourself, you should consider investing in the following tools:
Brush set (£10)
Seam roller (£5)
Self-adhesive film (£10 per roll)
Step ladder (£60)
Masking tape (£2)
Can My Dormer Loft Be Converted?
The majority of homes can be converted, although some may have more space than others to convert their loft. For example, if you have a traditional cut rafter roof or purlin roof which both form an M-shape in the centre of your loft, then the minimum height will usually be 2.2 metres at its highest. In contrast, a modern trussed roof will have just that bit extra with a minimum of 2.4 metres at its highest point.
To determine the extent of your conversion, you will also need to consider the pitch of your roof, as the higher it is, the taller the head height will be. However, many roof modifications can be implemented to accommodate enough headspace.
Measuring the internal walls is also a key indicator of whether your loft can be converted. To accommodate a dormer conversion, your loft’s walls should have a minimum of 7.5 metres from front to back and 5.5 metres from one side to the other. If your loft space is smaller than this, work can be done to increase wall space.
You should also make sure there is enough room for a staircase without being too cramped. There must be enough space for a head height of 1.9 metres with a steepness pitch of 42 degrees. In smaller lofts, space saver stairs can be used if they only lead to a single room.
Types Of Dormer Loft Conversions
| Type | cost | Features |
|---|---|---|
| Flat-roof dormer | £16,000 | - One of the most affordable dormer loft conversions
- Offers the largest amount of living space - Versatile application - Works well in lofts with minimal headspace |
| Hip-roof dormer | £6,000 | - Features three sloping planes
- Larger hipped roofs can maximise space - Adds a contrasting appeal on gable roofs - Enhances natural light |
| Gable-fronted dormer | £6,500 | - Has a simple pitched roof
- One of the most popular choices for period homes - Provides shade to dormer windows - Installed to enhance the architectural appeal and enhance light |
| Shed dormer | £15,000 | - A single-planed flat roof which slopes downwards
- A simple installation can reduce construction costs - Maximises loft space |
| Blind dormer | £4,000 | - Can be constructed to form any of the above shapes
- Does not penetrate the roof - Used for smaller loft conversions - The cheapest loft conversion available |
Planning Your Dormer Loft Conversion
When planning out your dormer loft conversion, you need to consider the best ways to utilise the space.
For a small dormer loft conversion, such as an en-suite or an office, you should consider the positioning of your furniture and where the best placement is to create more space.
You should also choose light décor for your walls and flooring to create the illusion of more space. Storage is also an important element in smaller spaces, for example, if you’re planning to implement a small spare bedroom, then you should consider purchasing a storage bed which will free up space.
For larger conversions which may include multiple rooms, you may want to opt for an open plan design which will allow you to maximise the space as much as possible.
In contrast, you may want more privacy with separate space, especially if you are building a bedroom dormer with an en-suite, which will require a doorway, so you may have to sacrifice some space in either one of the rooms.
Do I Need an Architect?
To assist you with the planning and design of your dormer loft conversion, you could hire an architect, who will charge around £50 – £60 per hour. While this may seem expensive, it can actually be extremely beneficial as an architect will help you create a design that is both unique and practical, while also making sure building regulations are met.
There are alternatives you could consider including a structural engineer, who typically costs around £50 per hour. Their main job is to help you understand the basics of the structure and what you can or can’t do when building your loft conversion.
You could also hire an interior designer to help you with the internal finishings such as the flooring, walls, appliances and any other decorations you will need. You can expect to pay around £100 an hour for interior design services. However, it may be worth it if you’re looking for a professional and sleek loft conversion.
Loft Conversion Staircase Costs
One of the most important things you need to consider is a staircase for your loft conversion, as this will provide you with an entry and exit doorway to the rest of the house. Typically, a staircase will be fitted on your upstairs landing where corner steps will be added for better access.
The legal parameters for a loft staircase are as follows:
A minimum height of 1.9 m above the pitch line.
A maximum of 16 steps, with typical loft staircases featuring 13 steps.
The step rise limit is 220mm, while the step depth must be a minimum of 220mm.
Cannot exceed the maximum pitch angle of 42 degrees.
Balustrades must be no lower than 900mm above the pitch line.
Spindles require a significant distance so that a 100mm cannot fit.
There are various staircases you can choose from with varying prices, such as:
Spiral staircase (£3,000)
L-shaped stairs (£2,500)
U-shaped stairs (£1,500)
Floating staircase (£4,000)
Curved stairs (£8,000)
You could also consider a space-saving staircase, which is perfect for small loft conversions. However, UK building regulations state that these should only be used to access a single room.
Space-saving staircases are a compact option that have alternating steps, which allows you to get into your loft room much quicker. A space-saving staircase can cost anywhere between £150 – £600, as a lot depends on the design you're after and the materials used.
Lighting Costs
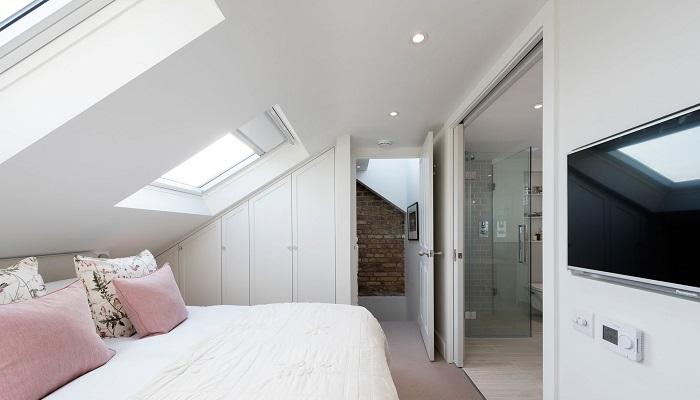
Lighting is another important element in your loft conversion, as roofs tend to be the darkest part of the home. There are various ways to enhance the light in your home, through both natural and artificial means.
Natural Light
Double-glazed windows (£300)
Triple-glazed windows (£400)
Skylights (£350)
Artificial Light
Lamps (£40 – £120)
Spotlights (£4 – £6 per bulb)
Dimmer switches (£7 – £25 per switch)
Low-energy lightbulbs (£3 – £6 per bulb)
Heating and Insulating Costs
To heat the rooms in your loft, you should consider the following options and their costs:
Electric radiators (£470)
Gas radiators (£200)
Plug-in heaters (£40)
Underfloor heating (£100 per m²)
Carpet (£12 – £60 per m²)
Another great way to retain heat in your loft is by investing in double-glazed (£300 per window) or triple-glazed windows (£400 per window), which will prevent any heat from escaping.
Insulation is also vital in heat loss prevention, so you should consider installing either slab foam or Celotex insulation in your walls (£100 per m²), floor (£3 – £20 per m²) and roof (£35 – £80 per m²)
Ventilation Costs
You must have controlled ventilation installed in your dormer loft conversion to prevent a build-up of condensation, while also keeping the air as clean as possible. Here is a breakdown of the different types of ventilation, the material costs and price for the installation:
| Type of Ventilation | Material Cost | Installation Cost |
|---|---|---|
| Background ventilation | Airbricks (£260)
Trickle vents (£15) |
£1,200
£100 |
| Rapid ventilation | Double-glazed window (£300)
Triple-glazed window (£400) |
£2,000
£2,500 |
| Extract ventilation | Extractor fan (£50) | £200 |
The Cost of a Dormer Loft Conversion With a Bathroom
If you’re planning to add a bathroom or en suite in your loft conversion, then you will need to make sure that you have a plan in place before you start. You will also need to consider your budget, as additional plumbing costs and furnishings will increase the cost of your dormer loft conversion.
The first steps in building a bathroom dormer extension will involve installing the plumbing (£700) and soil pipes (£1,000). It may be possible to extend the plumbing, as long as the bathroom is located in proximity to the existing waste and supply pipes. You may have to extra to move the pipes, which could add up to around £2,500 depending on how far it needs to be move.
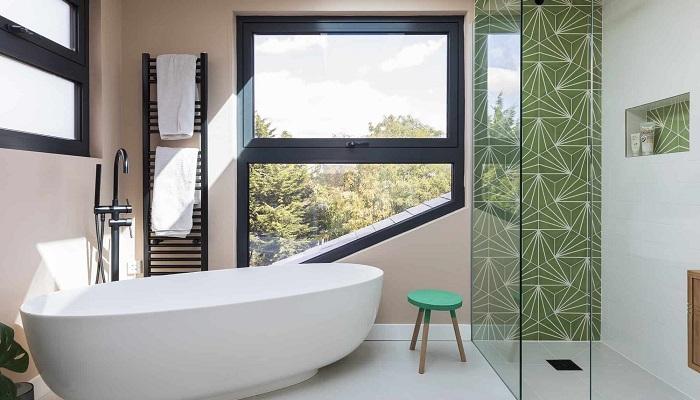
You will also need to consider the installation costs of your toilet (£250), sink (£320), shower (£600) and bath (£700). You should also make sure that you have available floor space measuring at least 1.7m by 2.3m to accommodate all bathroom fixtures.
Ventilation is also an important factor, as bathrooms tend to accumulate a significant amount of condensation. To prevent a build-up, you should consider installing an extractor fan and one or two windows to provide the right ventilation in line with building regulations.
Fire Safety
When planning your dormer loft conversion, it is important to consider fire safety regulation which will ensure the installation is safe. You also need to ensure compliance by covering the following safety criteria:
-
Provide fire-resisting doors (£70 – £300)
-
Install fire-resistant partitions (£36 – £125) to protect the stairway
-
Smoke alarms (£12 – £90) must be installed in the stairway on each level
Upgrade fire protection on the roof structure
Reasons for a Dormer Loft Conversion
There are many reasons why people choose to convert their loft, with the most common being it provides more space, especially in a small home.
It is also a great alternative to moving home, say for example you have another child and do not have a spare room, you can transform your loft space into a bedroom instead of dealing with the stress of moving out.
A dormer loft conversion is also a cheaper alternative to other roof conversions, which are most costly, can be risky and also take up a lot more time.
Benefits of a Dormer Loft Conversion
There are several advantages for constructing a dormer loft conversion including:
Increased space
Added property value
Cheap alternative to other loft conversions
Enhances natural light
Less building regulation restrictions
Much easier and less costly than moving home
Will a Dormer Loft Conversion Add Value to My Home?
If you are thinking about a loft conversion to provide some extra accommodation for you and your family, then this could also help your home should achieve a better price when you come to sell. Homeowners can reap the most financial benefits by adding on a bedroom and bathroom, which could see an increase of property value up to 20%, as you will be able to sell your home at a much higher value than what you bought it for.
So, provided you get the renovation done properly using high-quality material, a loft conversion is a great idea as it offers the additional space you need. You will likely recoup the entire cost of the project when you come to sell.
Planning Permission for Loft Conversions
Planning permission is not typically required for a loft conversion, as long as you stick the following requirements:
The volume allowance for a terraced house should be no more than 40 cubic metres for additional roof space.
The volume allowance for detached and semi-detached homes should not exceed 50 cubic metres of extra roof space.
An elevation at the front of a highway should not extend beyond the plane of the roof’s existing slope.
The extension should be no higher than the roof’s highest point.
Similar materials must be used in the construction of the loft conversion.
No balconies raised platforms or verandas should be added.
Side windows must be obscure-glazed, and any opening should be 1.7m above the floor.
Roof extensions are not permitted in world heritage zones, national parks or conservation areas.
All roof extensions except hip to gable roofs must be set back at least 20cm from original eaves.
The roof extension should not overhang the outer face of the existing house wall.
If any of your plans do not adhere to the guidelines, then you will have to apply for planning permission which should cost around £206 to apply.
Building Regulations for Loft Conversions
You should choose tradesmen/companies which are listed on the government's Registered Competent Person Scheme so they can give you a BS7671 certificate which complies with Building Regulations. You should also check that your plans meet the following criteria:
The dormer is constructed from timber covering the roof, front wall and side walls (cheeks).
The cheeks should be supported by with doubled and bolted rafters, floor joists, a beam and party or external walls.
The front wall should be supported off the external wall, or if set back, floor joists can support it as long as they can handle the extra load.
The dormer must be constructed to prevent a fire from spreading to neighbouring property.
For the installation of windows, roof lights and dormers, an opening needs to be cut in the existing rafters, and the remaining cut rafters will then be supported by a new dormer or new timbers.
If your dormer does not meet these regulations, then you will need to make a building regulations application, which can cost around £240.
How to Reduce Dormer Loft Conversion Costs
Trying to keep the cost of a dormer loft conversion down?
If you have a low budget, there are a few things you can do to keep costs down:
You could manage the project yourself instead of hiring a tradesman or company to manage the coordination of everyone who needs to be involved.
Consider how much extra liveable space you actually need and define (ahead of time) what you're going to use the extra space for. You might find that you're overestimating what you need.
If you're going to need planning permission, ensure that you apply for this as early as possible to avoid paying again.
Consider using basic quality materials and keeping the designs as simple as possible. Adding an ensuite to a dormer loft conversion can be costly by itself, so it's worth considering its necessity.
If you are going to add a bathroom in a dormer loft conversion, consider positioning it as close to your existing pipework as possible to reduce plumbing costs.
It's worth keeping in mind that financing a loft conversion through a loan tends to be easier, as they've home improvements that can add a significant chunk of value (if done right!) to a property.
Cost of Dormer Loft Conversion Removal
You may want to remove your dormer loft and install a new loft conversion, or maybe you have moved into a new home and do not like the look of the staircase leading to the conversion.
You should expect the cost of dormer loft conversion removal to be around £400, which includes materials and tradesman labour costs. This will vary depending on the type of dormer you have, though, as some installations can be challenging to deal with.
You could also remove the loft conversion installation yourself, especially if it just involves removing the staircase and filling in the ceiling space. All you would need to purchase is a ladder and hatch, which would be put in the place of the old staircase. This would cost around £150.
However, it might be more complicated than this if your dormer loft conversion has a bathroom. This would require the assistance of a plumber, who will typically charge around £55 per hour to remove any pipes or bathroom fixtures.
Roof modifications may also need to be made, which could cost up to £15,000.
FAQs
However, there are specific conditions and limitations attached to permitted development rights. You should always double-check with your local planning department — as this is the homeowner's responsibility to deal with.
You'll also want to ensure you obtain a Lawful Development Certificate from your local authority as written proof that your loft conversion is lawful. This is essential documentation that you'll need if you want to sell your home in the future.
Building Regulations ensure that the structure is safe and includes elements such as structural strength, stability, sound insulation, safety, and emergency fire exits.
While a small dormer loft conversion costs less than £10,000 on average, the typical cost of a dormer loft conversion is around £30,000 and would take between 6 to 8 weeks to complete.
The exact prices you're quoted will be highly dependent on the size of the conversion you're after, the quality of materials you want to use, the function of the rooms, and where you're located in the UK.
However, this will increase the overall cost of a dormer loft conversion — as it adds extra work and may require additional tradesmen to get involved in the project (which could slow it down).
Loft conversions aren't the only way to add more liveable space to your home, though. It's worth comparing and contrasting the various options — such as a single storey extension, garage conversion, or basement conversion.
A dormer loft conversion can also increase your property's value. You can expect a loft conversion to add up to 20% to the value of your home, but this will depend on the quality, size, and what room you're converting the attic space into.
However, this will vary depending on the type of dormer conversion you want to have, as well as the size of the loft extension you're planning.
Larger dormer loft conversions can take more than 6 to 8 weeks to complete, which is an approximate time frame for bedroom or bathroom dormers. If you face any complications, such as removing or working around a chimney or water tank, then the project will take longer. This will especially be the case if something if water pipes or electrics need to be rerouted.
Finding a Dormer Loft Conversion Specialist
If you decide you want to go ahead with a loft conversion of some type, then you're going to need to hire multiple different tradesmen to complete the job.
When you're assembling a team for a loft conversion project, ensure that you request references and look at evidence of their previous work. Planning permission may be needed, and building regulations will need to be followed, so it's important that you have confidence in them so that you can trust any guidance that they give you.
Don't be afraid to ask questions! And don't hire the first local tradesman that you find. You want to be hiring builders who specialise in loft conversions. If you don't, you might be putting your home, yourself, and your family in danger.
It's widely recommended that you get at least three quotes from different loft conversion specialists before you pick someone for this project. If you’d like to find local loft conversion contractors who can provide an estimate, use our tool to get 3 free quotes from specialists near you.
Sources
https://www.realhomes.com/advice/loft-conversion-ideas
https://www.planningportal.co.uk/permission/common-projects/loft-conversion/planning-permission
https://www.apexloftandroofconversions.co.uk/FAQs.aspx
https://www.diy.com/ideas-advice/paint-your-wall-like-a-pro/CC_npci_100047.art
http://www.melanielissackinteriors.com/blog/2017/6/26/how-to-wallpaper-a-simple-easy-guide
https://www.floorsave.co.uk/expert-advice/how-to-install-underfloor-heating
https://www.nklofts.co.uk/news/where-should-the-staircase-go-for-my-loft-conversion/
https://addaroomuk.com/blog/how-much-value-could-a-dormer-conversion-add
https://www.hlnengineering.co.uk/dormer-loft-conversions-explained/


