Floor Screeding Cost
Last updated 23rd April, 2025
Looking into how much it'll cost to screed a floor in the UK?
This guides includes everything you need to know about flooring screeding.
We've covered what floor screeding is all about, what's involved in screeding a floor, what typical floor screeding costs look like in 2025 — along with a breakdown of material costs, labour fees, and waste disposal charges.
We lay it all out below!

How Much To Screed a Floor?
There are several different types of floor screed which are suitable for domestic use. For most types, the cost will vary according to the area being covered. Typically, the smaller the area, the higher the floor screed cost. The traditional floor screed is a semi-dry cementitious material which can either be mixed on-site for small areas or pumped from a lorry for larger areas.
There are often additives such as fibres within this type of floor screed to reduce the chance of cracking. The average cost of traditional floor screed is £11-£14 per square metre. For a 50 square metre floor, the cost of covering it with a traditional screed flooring mix will be £1,050-£1,300.
Liquid or self-levelling floor screed is slightly more expensive as it is a fast and convenient way to screed a floor.
As it is a liquid compound, it reduces the chance of voids or air pockets in the screed, making it ideal for underfloor heating applications. Liquid screed flooring will cost between £12-£16 per square metre so for a floor of 50 square metres the cost would be £1,000-£1,400.
Fast-drying floor screed reduces the waiting time to proceed with a project from weeks to hours. The addition of chemicals to speed up the drying process without causing cracks in the screed makes it ideal for commercial and domestic use. For the rapid drying form, the cost of screed per m2 is between £14-£18. A 50 square metre floor area covered with fast-drying screed will cost £1,200-£1,500 on average.
Underfloor heating screed is another type of liquid screed but is a denser substance, making it an excellent heat conductor. This improved conductivity, coupled with the complete coverage of the liquid screed makes underfloor heating screed remarkably effective.
The cost will be between £16-£18 per square metre. For a 50 square metre room fitted with underfloor heating, the floor screeding cost will be approximately £1,300-£1,500.
The type of floor screed used and the area to be covered floor screeding prices will also depend on the ease of access to the worksite and the access to the floor itself. For example, the majority of a floor area may be suited to pumped floor screed, but there may be areas with obstacles such as pipework that will need to be done by hand to ensure complete coverage.
Different floor screeds will be used depending on the requirements of the finished floor area. Domestic floors will not have the same heavy usage or amount of foot traffic as a commercial floor, and therefore, the type and method of floor screeding will vary.
Floor Screeding Prices
The below table shows the average cost for different screed types covering various-sized areas and the cost of labour at an average price of £10-£12 per square metre is included.
| FLOOR TYPE | £ PER SQM | 50 SQM | 100 SQM | 150 SQM |
|---|---|---|---|---|
| Traditional sand/cement screed | £11-£14 | £1,050-£1,300 | £2,100-£2,600 | £3,150-£3,900 |
| Liquid screed | £12-£16 | £1,100-£1,400 | £2,200-£2,800 | £3,300-£4,200 |
| Quick drying screed | £14-£18 | £1,200-£1,500 | £2,400-£3,000 | £3,600-£4,500 |
| Underfloor heating screed | £16-£18 | £1,300-£1,500 | £2,600-£3,000 | £3,900-£4,500 |
Cost of Screed per Square Metre
The prices in the table below are the supply cost only for various types of floor screed and the prices to cover different sized areas. Labour costs are not included.
| SCREED TYPE | £ PER SQM | 50 SQM | 100 SQM | 150 SQM |
|---|---|---|---|---|
| Traditional sand/cement screed | £11-£14 | £550-£700 | £1,100-£1,400 | £1,650-£2,100 |
| Liquid screed | £12-£16 | £600-£800 | £1,200-£1,600 | £1,800-£2,400 |
| Quick drying screed | £14-£18 | £700-£900 | £1,400-£1,800 | £2,100-£2,700 |
| Underfloor heating screed | £16-£18 | £800-£900 | £1,600-£1,800 | £2,400-£2,700 |
Table of Contents
- How much to screed a floor?
- Labour cost to screed a floor
- Factors that increase the labour cost of floor screeding
- Factors that impact floor screeding costs
- What does floor screeding involve?
- DIY floor screeding
- What does DIY floor screeding involve?
- Types of floor screed
- Building regulations for floor screeding
- Planning permission for floor screeding
- Removing floor screed cost
- FAQs
- How to find and hire a floor screeding specialist
- Sources
Additional Costs to Screed Floors
Floor screeding is done in new build properties, renovations and extensions and the reason for screeding a floor in your home will also dictate what additional work may need to be done simultaneously.
Floor Installation
Whether you are building a new home or renovating or extending your existing property, the floor is one of the most essential aspects of the project. The choice of floor covering is important to get right as it is a time consuming, disruptive, and potentially expensive task to fix or change later on.
The decision to lay carpet, laminate or wooden flooring or tiles will depend on personal taste, budget, and room function. For example, a kitchen floor presents the possibilities of having tiles, laminate, solid wood flooring, vinyl, or polished concrete.
Vinyl is one of the least expensive but is a popular option due to its ease of fitting and costs around £15-£25 per square metre, including labour. Laminate flooring is also a relatively low-cost option and can be quite straightforward to fit. It will cost approximately £20-£30 per square metre to supply and fit.
Tiling a kitchen floor is a very popular choice as the surface is very easy to keep clean and can also be used in conjunction with underfloor heating. The cost to tile a kitchen floor will depend on the material the tiles are made from such as porcelain, sandstone, or granite but will be around £20-£30 per square metre on average.
Polished concrete as a finished floor surface is becoming very popular in recent times and can come in many different colours. The average cost will be between £25-£30 per square metre. The most expensive but one of the most stylish flooring coverings is probably solid wood flooring, and this can cost around £40-£70 per square metre to supply and fit.
Underfloor Heating
For a new build property installing underfloor heating is a good choice in terms of running costs and space-saving. Even for a conversion or renovation fitting underfloor heating is easy with retrofitting kits now available.
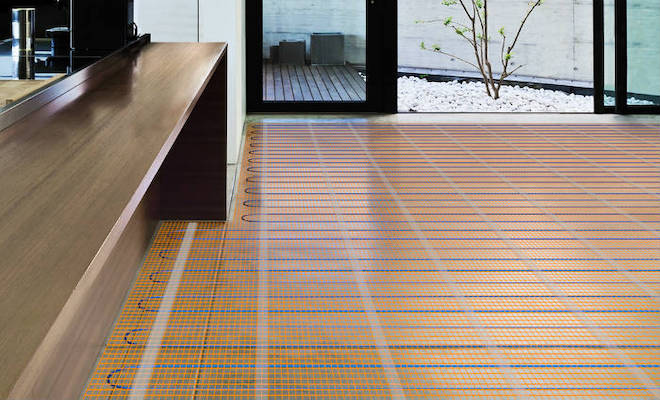
The two types of underfloor heating are electric and wet underfloor heating, which is a network of pipes with warm water flowing through them. It is this second kind of underfloor heating that will be screeded over. The average cost to install wet underfloor heating is around £100 per square metre.
Floor Screeding Cost Breakdown Calculator
Individual costs of floor screeding an area of 100 square metres with liquid screed - Total Total Cost: £2,500
Materials
£1,400
Tradesmen
£1,100
Waste
£0
Labour Cost to Screed a Floor
The cost of screeding a floor will include a large portion of labour costs as laying floor screed is quite a physical job. Depending on the type of screed, you are installing the amount of labour involved, and the timeframes will differ slightly.
Labour Costs
Traditional floor screed is a semi-dry mixture of sand, cement, water and sometimes added fibres to strengthen the mix.
It can be mixed on-site with a cement mixer or delivered ready mixed in a lorry. The screed is then loaded into wheelbarrows and taken to the floor to be covered where it is then emptied and levelled by the plasterer.
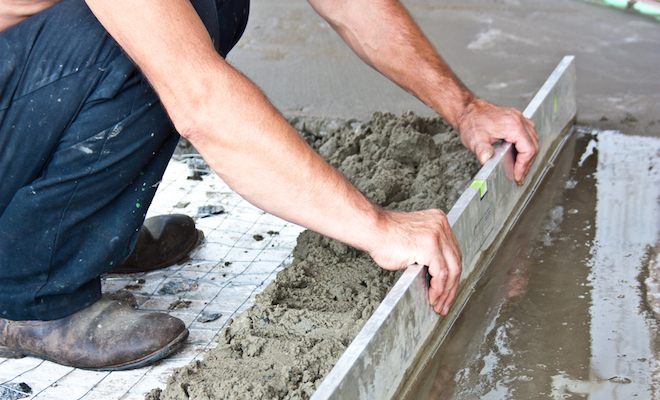
This is done with a trowel and a long piece of timber used as a straight edge. The screed is then smoothed over with a plasterer's float. Liquid screed is applied with a long hose and pumped directly onto the floor to be covered. Pre-set depth gauges are placed on the floor so that the screed is not laid on too thick.
This will be a problem if the screed covers underfloor heating as the heat will only penetrate up to the screed's set depth, which is usually around 50mm. While applying liquid screed to a floor is not as physically taxing as traditional screed, it does require skill and expertise to get it right.
If you hire a screeding company to cover your floor, then the labour cost will be included in the price. Alternatively, you could order a load of floor screed to be delivered to your site and hire a plasterer separately to do the work.
Timeframes
Different screeds will have varying times of preparation, application and drying. Traditional floor screed being mixed on-site can be done on a rolling basis with one person mixing and another laying the floor screed.
Depending on the area that needs to be covered, this could take a few hours or days. Alternatively, a ready mixed screed delivery can be taken in wheelbarrow loads to the floor area, making the process much quicker.
However, this process can be quite stressful if the lorry has to park a distance from the site and quite often there is a fixed offloading time.
Drying times for traditional floor screed are roughly 1mm per day up to 40mm and then two days per millimetre for anything deeper than that. The optimum temperature would be around 20°C with good ventilation. Of course, the weather will have an impact on this drying time.
Using liquid screed is much quicker, and some companies will provide a lorry that both mixes and pumps the screed on-site so large areas can be covered in very short timeframes.
Following the liquid screed application to the substrate, it may be 'dappled'. The process involves lightly tamping the screed with a dapple bar tool to release any air bubbles trapped in the floor screed mix.
This ensures a smooth and even finish. Liquid screed application can be done very quickly, and a whole ground floor of a new build can be done in an hour.
Factors That Increase the Labour Cost of Floor Screeding
As with any construction work, there will always be external factors that can affect the time a job takes to complete and the cost of aspects such as labour.
Type of Floor Screed
The choice of floor screed will affect the amount of labour required to lay it and the timeframes for preparation, application, and drying. Traditional sand and cement floor screed takes longer to mix if done on-site in a cement mixer and even when delivered ready-mixed by lorry it is still very labour intensive.
Application of traditional floor screed is a very physical job and requires at least two people, one to bring the wheelbarrow of screed to the working area and a plasterer to level it out.
For a bigger job, three or four people working two cement mixers will speed the process up although it is unlikely two plasterers will work the same floor area unless it is very spacious or in different rooms.
Liquid screed is a much quicker application as it is pumped out of a lorry ready mixed and applied directly to the area where it is needed. It is less labour intensive and will make the process of screeding the floor much faster, thereby reducing labour costs.
Quick-drying floor screed will cut the waiting time for installing the finished floor covering. Many of these screeds will be dry enough to walk on in 24 hours and should accept flooring within days, depending on the screed depth.
This will reduce costs and shorten the overall timeframe of the job.
Size of Floor Area
The area of floor to be covered in screed will have a direct impact on the labour cost and the amount of time that the job takes. If the area is exceptionally large, then more manpower may be required to get the floor screed down, whether to mix or apply it.
Larger floor areas may take longer to dry out although this will depend on the floor screed's depth and environmental conditions.
Drying Time
The drying time of the particular screed that you use will impact the timeframe of the job. Traditional sand and cement screed will take longer to dry out at a rate of around 1mm per day up to a depth of 40mm and half a day per millimetre beyond that.
Although the screed may be capable of taking foot traffic after a few days. Any final floor covering should not be installed until the screed has completely dried out which could take several weeks depending on the size of the area and the depth of the floor screed.
This can significantly delay the progress of the work and why rapid drying and liquid screeds have become so popular. Liquid floor screed is much less labour intensive and can be applied up to ten times faster than traditional sand and cement floor screed.
Some types of liquid or 'flow' screed can also be force dried meaning that a final floor finish can be fitted more quickly, reducing the timeframe.
Weather
The weather can affect the application and drying of floor screed, thus impacting on timeframes and labour costs. Sand and cement floor screed should not be laid in temperatures lower than three °C or when the floor temperature is below five °C.
This may mean delaying the application until the temperature has risen, which could cost money in terms of working hours lost and time wasted. Cold and damp weather means that the floor screed will take longer to dry as the cold air will not hold as much moisture. This will slow the drying time for the screed.
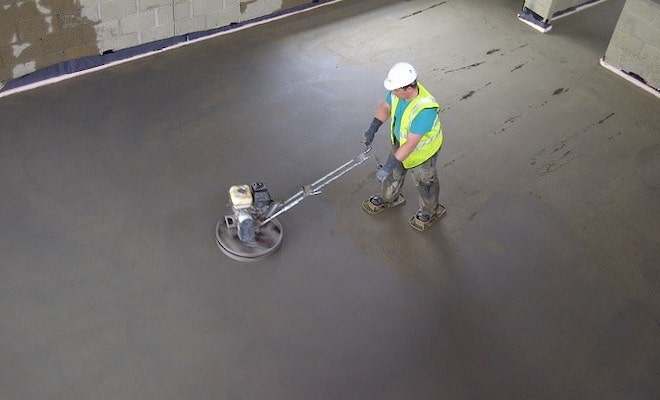
While it may be tempting to increase the room temperature to speed up the drying process, this is not recommended as too rapid drying can cause the screed to shrink and crack. Only specific liquid or flow screeds can be force dried.
Hot weather can similarly cause problems when laying traditional floor screed as the hot, dry air can cause it to dry out too quickly and crack. There are curing methods for different floor screeds, and one is to fix polythene sheets over the screed to deliberately slow the drying process in hot weather.
Having to carefully manage the curing of the screed in different weather conditions can prolong the job and increase labour costs.
Factors That Impact Floor Screeding Costs
The cost of screeding a floor will depend on several factors including the size of the area to be covered including the thickness, the type of screed used as well as the location of the property and ease of access to the site.
Coverage Area
The square meterage of the floor to be screeded will directly affect the cost of the project. While it may seem that the larger the area, the higher the price per square metre this is not often the case.
For ready mixed screed delivered by lorry having a full load, delivery is more cost-effective for the supplier.
Part loads or smaller quantities will incur an extra charge as the lorry is not being used to full capacity, but the fuel and operative's labour will cost the same.
Thickness
The floor screed's required depth will also affect the cost as a thicker screed will require a greater volume.
Different methods of laying floor screed will determine the optimum thickness. For example, bonded floor screed is laid directly onto a concrete substrate and bonds with the layer beneath it.
The ideal thickness for this floor screed as a traditional sand and cement mix is between 25mm-40mm. Unbonded floor screed has a membrane between it and the substrate with a minimum depth of 50mm.
Floating floor screed is applied over a layer of acoustic or thermal insulation, and this should have a minimum thickness of 65mm for lightly loaded floors and a minimum of 75mm for more heavy loads.
The thickness of liquid floor screed, particularly over underfloor heating should be a minimum of 50mm although the heating pipes' diameter will be a factor.
The requirements of the underfloor heating will also determine the thickness of the floor screed. If more responsive heating of the floor is required, then the screed should be thinner whereas the thicker screed will store more of the generated heat.
Deeper floor screed is best suited to underfloor heating supplied by an air or ground source heat pump.
Type of Floor Screed
The choice of floor screed for your project will influence the cost. Traditional sand and cement floor screed costs around £11-£14 per square metre and is the least expensive option. Liquid or flow screed is very popular, especially on large areas and for underfloor heating. The average cost for liquid screed is £12-£16 per square metre.
Fast drying or accelerated floor screed is useful where there is little time for it to cure before the floor finish is installed.
It costs around £14-£18 per square metre. Underfloor heating screeds specifically formulated to enhance underfloor heating performance can be laid as thinly as 20mm above the heating pipes. They have improved thermal conductivity and cost between £16-£18 per square metre.
Location
The property location will have an effect on the cost of the floor screeding as material and labour costs vary between different parts of the country. If you hire a plaster in London you will be paying on average £30-£35 per hour, for other parts of the country this could be around £15-£20 per hour.
The cost of materials will vary in different parts of the country according to availability. London prices will normally exceed the rest of the country by at least 20% and sometimes by as much as 50%.
Access
If there are issues with access to the site where the floor screeding is needed, this may cause delays or extra expense in time or labour.
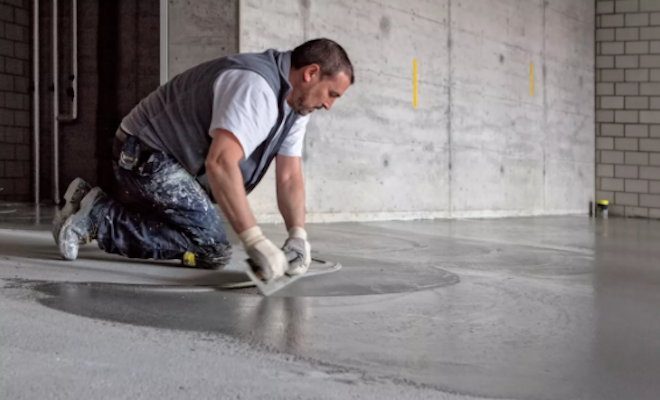
Remote locations or properties in narrow roads may have difficulty getting ready-mixed screed lorries to deliver directly to the site. This may mean longer offloading times or mixing screed on site manually, thereby increasing labour and delivery costs.
What Does Floor Screeding Involve?
Traditional floor screed is a mixture of sand, cement and water which is laid on a floor base and will take the final floor finish or covering.
Liquid screed uses calcium sulphate as a binding agent instead of cement, and this produces gypsum when water is added and is popularly used over underfloor heating. These two-floor screeds have very different application methods due to their very different consistencies.
The method of applying a liquid floor screed is quite different from that of a traditional sand and cement floor screed.
DIY Floor Screeding
The decision whether to attempt screeding a floor as a DIY project or hire a professional will depend on several things; the size of the floor area, the type of screed and experience of doing similar work.
Professional or DIY
The most likely type of screed to be used for a DIY project is traditional sand and cement floor screed. It has been in use for nearly a century, and in terms of floor screed prices, it is the cheapest to use.
It is also a fairly straightforward process, but that is not to say that it does not require a degree of skill and competence.
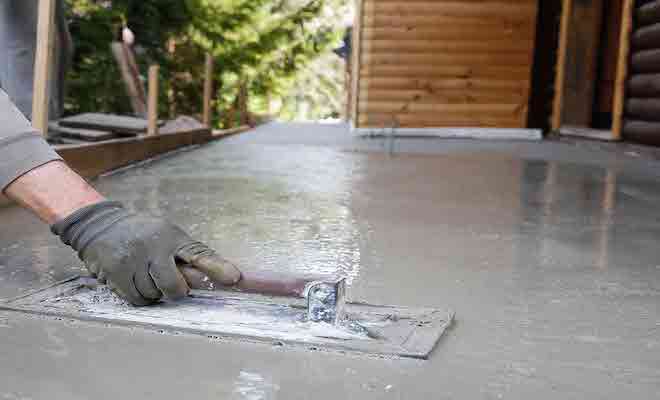
However, a confident DIYer who has done similar work in the past should be able to do this job without too many problems.
The finish may not be the same as having it done by a professional, but as the screed isn't a structural component there shouldn't be any major issues. Especially if it's being covered by a floor finish such as tiles or carpet.
Dangers of DIY
If you are not sure how to screed a floor, you should leave the job to a qualified and experienced contractor.
Not only will that give you peace of mind that the work has been carried out to a high standard, but there are dangers inherent in any DIY work that will be avoided.
Some of the dangers of screeding a floor can include strained muscles or back injury from lifting bags of sand and cement, inhalation of cement dust or the risk of debris getting in your eyes, along with other potential hazards.
Common Floor Screed Problems
Although floor screeding is a standard method to create a smooth base level for flooring, it can come with potential issues. Common problems include cracking or producing uneven surfaces.
It’s crucial to mix the screed correctly and to maintain the correct temperature and moisture levels throughout the process. Failing to do so can result in delamination or shrinkage, which will create a poor surface to work with.
Ensure to protect the screed when you have finished, by covering with a plastic sheet as it dries to avoid any last-minute cracks or unwanted damage.
What Can be Done DIY?
Of course, some of the work is possible to do yourself, such as mixing the sand and cement while hiring a professional plasterer to lay the screed. Likewise, you could sand down the anhydrite liquid screed once a specialist company has applied it.
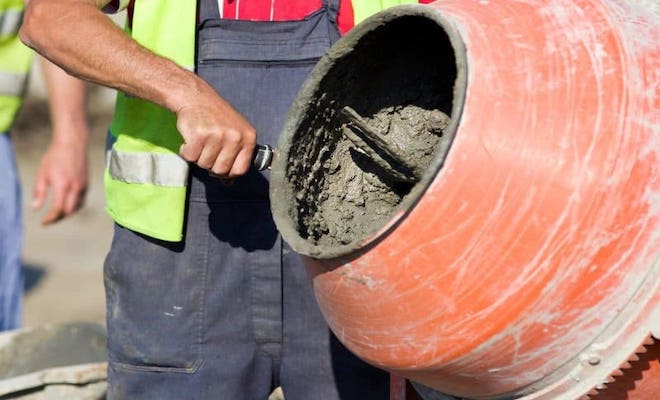
Preparing the floor prior to the screed being laid can also be done DIY, especially for a bonded screed that requires the substrate's surface to be roughened before application.
Saving Through DIY
The amount that you would save will depend on the arrangements you have made for delivery and application of the different screeds.
By mixing the traditional floor screed for a plasterer, you may cut the timeframe for the work and reduce the labour cost.
A plasterer will cost approximately £15-£35 per hour depending on where in the UK you live so the saving will depend on how much time is saved with DIY input.
If you did the entire job yourself, you would save in the region of £120-£250 per day depending on where you live.
Tools & Equipment Needed
The tools and equipment that you will need for DIY floor screeding are:
- Cement mixer
- Wheelbarrow
- Shovel
- Bucket
- Plasterer's trowel
- Plasterer's float
- Straightedge or length of timber
- Spirit level
Safety Equipment & Clothing
The safety equipment and clothing that you will need for DIY floor screeding are:
- Gloves
- Safety boots
- Dust mask
- Safety goggles
- Knee pads
What Does DIY Floor Screeding Involve?
Floor screeding can seem like an intimidating project for relatively inexperienced DIYers, but it's surprisingly digestible when broken down into clear steps. Take a look at the procedure below to get a sense of how confident you'll feel taking on the job.
1. Prepare your equipment
As with any DIY job, having the right tools to hand is crucial. For this one, you'll want to grab a wheelbarrow, a trowel, a shovel, wooden battens, and, assuming you'll be preparing your own traditional screed mixture, sand and concrete.
Of course, never forget to wear protective clothing for safety. In this case, eye protection and gloves at the very least are recommended.
2. Mix the screed
If you've never mixed screed before, this process might take a little longer than you expect because you'll need to work towards the perfect mixture gradually rather than going straight for the ideal ratio with the benefit of years of experience.
Generally, a mixture that sits somewhere in the region of four parts sand to one part cement should be about right. When that initial mix is ready, gradually add water until you achieve the right consistency.
Keep in mind that no liquid should escape the screed, even when squeezed. If moisture does leak, you'll need to add more sand and cement.
3. Create sections of flooring
It's a tall order indeed to screed an entire floor in one fell swoop, unless the room is particularly small, so be sure to divide the area into sections using straight edge timber battens.
It's a good idea to wet the battens before placing them, which makes them easier to remove from the screed later. You can keep the battens in place by applying a small amount of screed to their edges when you initially lay them.
Keep in mind that when using homemade screed, it might be necessary to lay a damp-proof polythene sheet across the floor before placing battens.
4. Apply the screed
Starting with the section furthest from the door, so that you can still come and go without disrupting your work, fill the section with screed. Use a trowel to spread the mixture.
5. Level the screed
Use a hand tamper beam to level out the screed, and check it's flat using a spirit level. It's helpful to use a side-to-side, sawing motion, starting at arms length and pulling gradually towards you. When you have filled and levelled two neighbouring sections, you can remove the batten between them, and then fill and level the gap that's left behind.
6. Cover the entire floor
Repeat steps 4 and 5 and until the entire floor is covered and levelled, and battens have been removed.
7. Cure and dry
To help cure the screed, you can cover the entire area with polythene to lock in moisture and leave it for around seven days. Make sure that the surface remains untouched for this period, otherwise you could damage the screed, and that's not what you need.
Once the curing period is done, it's a case of leaving the surface to dry. Remove the polythene sheet and let the whole area dry for 24-48 hours.
Types of Floor Screed
There are several different kinds of floor screed on the market and the type that you use will be determined by the requirements of the job, your budget, and accessibility to the site.
Sand & Cement Screed Cost
Traditional floor screed is a mixture of sharp sand and cement typically to a ratio of 4:1, although this can vary according to individual jobs' needs. It differs from pumped screed such as liquid or anhydrite screed in its consistency and method of application.
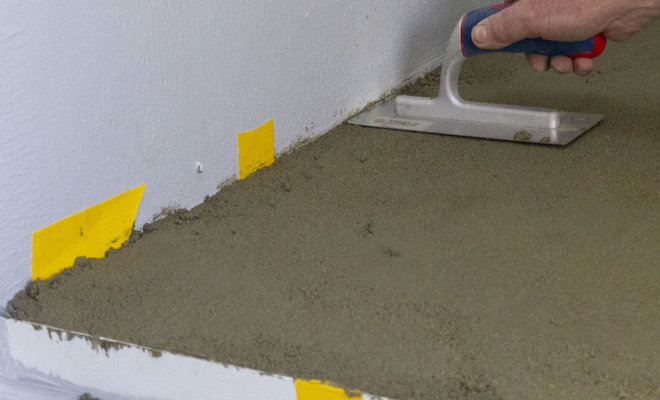
This is the least expensive of all floor screed prices, and the average cost is £11-£14 per square metre.
Pros of sand and cement floor screed:
- ✔ Relatively cheap to prepare and apply
- ✔ Can be done as a DIY job
- ✔ Possible to use on sloping floors such as wet rooms
Cons of sand and cement floor screed:
- ✖ Unsuitable for underfloor heating
- ✖ Prone to cracking and shrinkage
- ✖ Labour intensive
Liquid Screed Cost
The majority of liquid screeds are anhydrite mixtures made from calcium sulphate, which acts as a binding agent in the absence of cement. It is very different to a traditional floor screed made from sand and cement in its composition, application and uses.
The average cost of liquid screed is between £12-£16 per square metre depending on the variation or manufacturer.
Pros of liquid floor screed:
- ✔ Much quicker to lay than traditional floor screed
- ✔ Suitable for underfloor heating
- ✔ It is a self-levelling floor screed
Cons of liquid floor screed:
- ✖ More expensive than sand and cement floor screed
- ✖ Anhydrite liquid screeds need to be sanded before floor covering goes on
- ✖ Cannot be widely used in wet environments
Fast Drying Screed Cost
This sand and cement floor screed has an additive which allows it to dry a lot quicker than normal screeds without the issue of cracking commonly associated with rapid drying. Some of these floor screeds can dry at a rate of 5mm-6mm per day compared to 1mm per day with normal sand and cement screed.
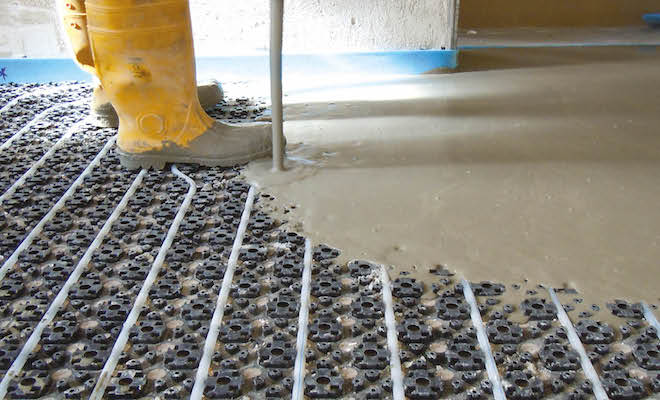
The average cost of fast drying floor screed is between £14-£18 per square metre.
Pros of fast drying floor screed:
- ✔ Cuts the timeframe of the project
- ✔ Final floor covering can be laid sooner
- ✔ Just as strong as traditional floor screed
Cons of fast drying floor screed:
- ✖ If the manufacturer's instructions are not followed cracking can occur on drying
- ✖ Environmental conditions can affect the drying time
- ✖ High humidity will slow the drying rate
Underfloor Heating Screed Cost
Underfloor heating has been specifically developed to enhance the performance of wet underfloor heating systems. This is due to the thermal conductivity in underfloor heating screed, which is superior to normal liquid screed.
The average cost of underfloor heating screed is between £16-£18 per square metre.
Pros of underfloor heating screed:
- ✔ Designed to enhance the performance of wet underfloor heating systems
- ✔ Does not leave any voids or gaps
- ✔ Very quick to lay
Cons of underfloor heating screed:
- ✖ One of the more expensive floor screeds
- ✖ Not typically a DIY job
- ✖ Is reliant on the underfloor heating pipes being laid correctly
Building Regulations for Floor Screeding
There are no specific Building Regulations for the application of floor screed in a property. However, the National House Building Council (NHBC) do have certain standards concerning floor screed in new builds.
The NHBC standards for floor screeding relate to newly built properties, not renovations, extensions, or other conversions. Information on required floor screeding standards in new properties are available on the NHBC website.
It's also worth noting that there are related issues regarding insulation and damp proofing, which can be found in Approved Document L of the Building Regulations.
These related examples may require approval, for example, if subfloor insulation is part of a new build or larger renovation project. Damp proofing in relation to floor screed is another consideration if applying in areas where excess moisture is an issue, such as basements.
When preparing a surface with floor screed, take into consideration any load-bearing regulations and if ever in doubt, remember to contact your local authorities.
Planning Permission for Floor Screeding
There is currently no requirement to apply for planning permission when laying floor screed. The installation of underfloor heating in an extension or renovation will be part of the plans that would be submitted to the local authority by your architect.
As such, this will be considered as part of the planning process. The cost of applying for planning permission is £206 in England, £190 in Wales and £202 in Scotland.
Information on planning permission can be obtained from your local council's website, the government website or the Planning Portal.
Removing Floor Screed Cost
There are a few reasons why you would need to remove floor screed. For example:
- Renovating all or part of your house
- To expose old ornate floor tiles
- There are damp issues that need to be addressed
- To retrofit underfloor heating
- The existing floor screed has failed and needs to be replaced
Whatever the reason for removing the floor screed the cost in labour will be determined by the amount to be removed, your location, the floor screed mix used, and accessibility. On average you should expect to pay between £120-£160 per day.
DIY Floor Screed Removal
You could remove the floor screed as a DIY project, but you will need the appropriate tools and safety equipment to do so.
Depending on the floor screed mix used you may need to use a Kango hammer or a hammer and bolster chisels.
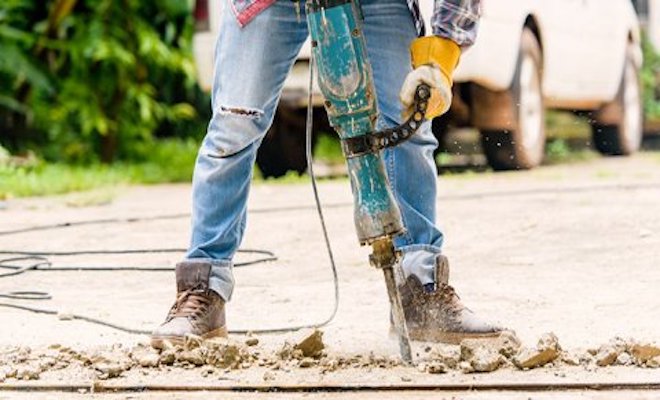
Various chemicals will soften the screed to make it easier to remove but be aware that it will be a messy job and there will be fumes so you will need to wear a dust mask and other safety clothing.
Disposing of Waste
If you are doing a renovation, chances are you will have a skip on site so you can dispose of the removed floor screed in this way. The cost to hire a skip is approximately £200-£300 per week, but this will depend on your location in the UK.
If the floor screed removal is a one off job, you may be able to take it to your local recycling facility, but you should check with them first.
FAQs
A polythene sheet is laid on top of the insulation boards, and the screed poured over. This sheet prevents the screed escaping between the insulation and holds the screed in place.
Liquid or self-levelling floor screeds differ according to the manufacturer so check the details of the particular screed you are using.
Environmental factors such as the weather or humidity levels on the site will affect the drying times too.
Typically, the prime purpose of floor screed is to give a smooth and level finish to the floor for the application of a final floor covering such as tiles, carpet, or wooden flooring.
It is also used over underfloor heating and in this situation is used as a thermal conductor.
This is because sand and cement floor screed will not conduct the heat as well as a liquid or self-levelling floor screed.
A traditional sand and cement floor screed is also more likely to be used in a DIY situation and a pumped floor screed in commercial or industrial construction so it will depend on the individual project.
For example, if thermal or acoustic insulation is being laid a minimum depth of 65mm would be laid for an area expected to have light traffic.
For heavier traffic, the thickness should be increased to 75mm. Liquid or underfloor heating screed is laid to shallower depths to allow the best thermal conduction by the floor screed.
Curing is the process of preventing excessive or rapid moisture loss from the screed whilst still maintaining an ambient temperature.
Drying refers to the evaporating of surplus moisture from the floor screed without causing cracks or fractures.
How to Find and Hire a Floor Screeding Specialist
You may want to hire a floor screeding specialist if your project is large, on a tight schedule, or you are not confident about screeding a floor.
Where to Find a Floor Screeding Specialist
If you do not know of a reputable floor screeding specialist or plasterer, you need to decide how you will source one.
Personal recommendations from family, friends, work colleagues or neighbours is a good way to go. This route can mean you have first-hand accounts of the work carried out as well as the general attitude and pricing structure of the screeding contractor.
Average Cost
The average cost of hiring a floor screeding specialist will depend on your location, the size of the area to be screeded, and the type of screed that you use.
The average cost for different types of floor screed is £11-£18 per square metre while labour will cost you on average £10-£12 per square metre.
What to Look For
When looking for a floor screeding specialist, or plasterer for a smaller area, it is important to find someone reputable and reliable.
Although floor screed is not a structural element of a building if it fails or is done badly, it can have expensive repercussions in terms of repair or replacement.
Qualifications
The basic qualification for floor screeders is the NVQ Level 2 Diploma in Specialist Concrete Occupations. There are also tanking and floor screeding courses available from specialist construction training providers.
Larger companies who specialise in different types of screeding may provide inhouse training for their operatives.
For a small to medium-sized project such as an extension or renovation, a plasterer may be used particularly if you use sand and cement floor screed.
Plasterers qualifications include Level 1 Award in Construction Skills (Plastering), Level 2 Diploma in Plastering or Level 3 Advanced Technical Diploma in Plastering.
Experience
Most floor screeding specialists or plasterers will get their experience on the job working with a fully qualified and experienced contractor.
You should ensure that the person you are hiring to do your floor screeding has the relevant experience with the type of screeding you want.
Plasterers will mostly be familiar with sand and cement floor screed although some may have had training in how to lay liquid or rapid drying floor screed.
Accreditation
While some companies may be accredited in applying and laying particular brands and makes of floor screed, there is no national accreditation for floor screeding specialists.
Plasterers can gain accreditation from the British Gypsum Certified Plasterer Scheme which certifies that they are qualified, insured and have passed a British Gypsum assessment.
Insurance
It is your responsibility to check that any tradesperson working on your project has the right insurance. It is reasonable for you to ask for proof, such as a copy of their insurance certificate.
Public liability insurance will protect the floor screed contractor from damage or injury claims from customers or members of the public.
The amount of cover will depend on the company's size and the size of the projects that they carry out but is normally between £1 million and £5 million.
Contracts work insurance is useful cover that will pay for repair to work in progress caused by damage from the weather, vandalism, or theft.
Qualifications and Training
You can and should check the qualifications and certification of a floor screeding specialist or plasterer working on your home.
Most professional contractors will provide evidence of these either on request or as part of your paperwork when you get a quotation or works contract.
If it is not provided, you are within your rights to ask for appropriate proof.
Sources
https://www.planningportal.co.uk/permission/common-projects/extensions/building-regulations-flooring
https://www.flowcrete.eu/en-gb/products-systems/product-ranges/sub-floor-screeds/
https://www.screedgiant.co.uk/screeding-in-cold-weather/
https://buxtonflowscreeds.co.uk/what-is-liquid-screed-made-of/
https://www.concretecentre.com/Building-Solutions/Floors/Floor-Screeds.aspx


