TV Aerial Installation Cost
Last updated 23rd March, 2025
Looking to find out how much it costs to install a TV aerial in 2025?
The exact cost of a new TV aerial installation mainly depends on the type of aerial you want to install and where you're located in the UK. Keeping this in mind, the average TV roof aerial fitting cost is around £200 in 2025.
In this guide, we cover everything you need to know about TV aerial installation costs. This includes the price differences for outdoor aerials vs indoor aerial systems, additional costs you might need to budget for, and much more!
Let's get started!
Table of Contents
- How much is a TV aerial installation?
- How much is a TV aerial? (Supply only)
- Cost of TV aerial installation labour
- What does installing a TV aerial entail?
- DIY TV aerial installation
- Choosing the right location for my aerial
- How to mount an aerial
- Choosing the right TV aerial
- Outdoor TV aerial vs loft TV aerial
- Testing TV aerials
- How to join aerial cables
- How to get rid of TV interference
- Do set top aerials work?
- Diplexers and splitters
- Landlord responsibility for TV aerials
- Long-distance TV reception
- Aerial amplifier Cost
- Satellite dish installation cost
- TV aerial removal cost
- FAQs
- Sources
How Much Is a TV Aerial Installation?
Let's get straight into this:
The average TV aerial installation costs around £200 in the UK.
This estimation assumes that you're getting a standard-sized new TV aerial, a pole, a new cable, and a new TV socket. It will take a professional TV aerial fitter between 4 to 6 hours to complete this job.
However, new TV aerial installation costs will vary based on the type of aerial you want, your location in the UK, and your property's accessibility.
You might also need to budget for additional materials (like a signal booster if you're not getting a great TV signal in your area).
One critical factor that impacts the cost of a TV aerial installation is whether you need to get an outdoor aerial. If the signal in your local area is good, then you might be able to save money by getting an indoor TV aerial installed in your attic instead.
The average cost of getting a TV aerial installed in your loft is about £40.
This includes the labour, installation, and supply costs — and will typically not take more than 1 to 2 hours for an experienced TV aerial fitter to complete this job.
TV Aerial Installation Prices
The table below summarises the cost of installing a new TV aerial or replacing an existing TV aerial.
| Job Description | Avg. Cost | Duration |
|---|---|---|
| Install new outdoor TV aerial system | £200 | 4 – 6 hours |
| Install new indoor TV aerial system | £40 | 1 – 2 hours |
| Replace like-for-like outdoor TV aerial | £100 | 2 – 3 hours |
| Replace like-for-like indoor TV aerial | £20 | 1 – 2 hours |
| Install extra TV aerial socket | £100 | 2 – 3 hours |
| Replace TV aerial with satellite dish | £250 | 2 – 3 hours |
As this table shows, the cost to replace a TV aerial that's installed outside is about £100. However, TV aerial replacement costs are around £20 if the aerial is installed in your loft.
TV aerial replacements are around half the cost of a new TV aerial fitting. This is because a simple replacement of a TV aerial can likely use the existing pole, cabling, and sockets.
How Much Is a TV Aerial? (Supply Only)
The cost of installing a TV aerial is simple to calculate, as it's based on the time that a professional spends on the job.
However, the materials required to install a TV aerial in your circumstances may vary.
Let's take a closer look.
TV Aerial Cost
The average cost of a TV aerial is between £24 and £42.
Typically, loft aerials cost between £22 and £42, which is a little less than what you should expect to pay for a TV aerial that's installed on the outside of your property.
| Type of Aerial | Price | Application |
|---|---|---|
| Yagi aerial | £35 – £50 | Offer a good signal range. |
| Log periodic aerial | £28 – £42 | Good at cancelling out impulse noises which cause loss of signal. |
| High gain aerial | £20 – £45 | Delivers one of the highest signal levels. |
| Grouped aerial | £26 – £35 | Equally distributes signal across a group of channels. |
| Indoor aerial | £15 – £35 | Digitally compatible with the best possible picture. |
| Loft aerial | £22 – £42 | Sustainable signal solution protected from the weather. |
Aerial Mast Cost
An aerial mast is used to securely mount a TV aerial to your property.
These are usually made up of steel, alloy, or aluminium. The type of mast or pole you choose will depend on the type of aerial you're installing, the material, and how big it is.
The most common domestic TV aerial poles are 6-foot x 2-inch. However, in some cases, you will find smaller or larger masts.
Take a look at this cost breakdown of 6-foot x 2-inch aerial poles in steel, alloy and aluminium to help you decide which option is best for you.
| Aerial Pole Type | Avg. Price Per Pole |
|---|---|
| Steel | £5 |
| Alloy | £9 |
| Aluminium | £10 |
Aerial Bracket Cost
You will need brackets to ensure that your TV aerial remains safely secured in place over the years. This is critical to ensure that it doesn't fall off, as it could cause serious damage to property and people.
An experienced aerial specialist should make sure that the brackets match up with the size of the mast they are using. For example, a 6ft pole will require at least a 6-inch welded wall bracket — which would cost around £5.
Aerial Cables Cost
A TV aerial specialist may advise you to have your coaxial cables replaced to improve radiofrequency.
TV satellite companies often use this type of cable to connect a satellite to your television. If your cables are old and worn, you may want to consider replacing them.
This type of cable is measured per radio guide number. RG-6 coaxial cabling is ideal for the average TV and would cost around £20 for 20 metres. But if you have a smart TV, the better option might be RG-11 coaxial cabling, which can cost up to £40 for 20 metres.
Although it's tempting to go with cheaper aerial cabling, keep in mind that it might be cheaper in the long run to install higher-quality options that don't need to be as frequently replaced by a professional. Higher-quality cabling might also lead to a more consistent TV-watching experience.
Aerial Cable Clips Cost
Another important component you will need for your TV aerial installation is cable clips, which are used to secure wires and cables together to either your wall, ceiling, or floor.
TV aerial installers will typically use 7mm coaxial cable clips, which cost around £2 for a pack of 100.
Signal Booster Cost
If you have multiple televisions in your home, then you will require splitters to distribute signals to each room, which will cost between £4 and £10 (depending on how many devices you are using).
To boost the signal in each room, you might also need a distribution amplifier. The price of a signal booster adds between £20 and £40 to the cost of a TV aerial installation.
TV Aerial Installation Cost Calculator
Below is a breakdown of what a TV aerial installation costs for an entirely new TV aerial system in 2025.
Total Cost: £200
Materials
£50
Tradesmen
£150
Waste Removal
£0
Cost of TV Aerial Installation Labour
When calculating the price of your aerial installation, you need to consider the labour costs. This will depend on the difficulty of the job, as well as the time spent completing the installation.
A standard installation, which would include an aerial pole and standard bracket, would take around 4 to 6 hours and would cost between £100 and £150.
For a replacement aerial installation, the engineer should only take around 2 hours to complete the job, which would cost around £50.
What Does Installing a TV Aerial Entail?
The price you will pay for a newly installed aerial will depend on the following:
Your location.
Length of pole required.
If new cables are needed within the house.
Whether a splitter and amplifier are needed.
If you have a very high roof and/or access to the roof is difficult, then expect to pay more for an aerial installation.
If you live within the M25 then you can also expect to pay a lot more than someone who lives in the north.
Whether your installer is a highly skilled professional or a cowboy charging peanuts for substandard work!
If you already have an aerial and internal cable fitted with a TV point, then the job is much easier, however, if you do not have one or require it to be moved, then you may need to add some redecorating costs to the total cost.
The TV aerial point is usually sunk into the wall plaster, so it will need to be filled and repainted/wallpapered when finished.
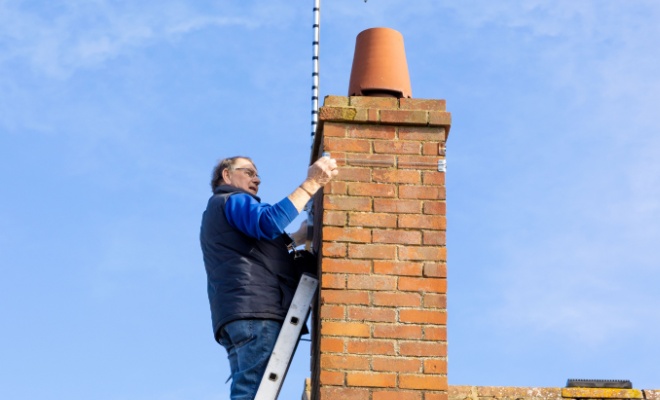
Try your best to stick to reputable and professional aerial installers.
If you are ever told you need the entire system replaced, including the pole, cabling and the aerial itself, then question this and ask for a full explanation, plus get a second and third quote from reputable installers.
On paper, fitting a TV aerial does not sound like a difficult task, but it almost always involves working safely at height and the trickier installs may require access to special equipment and knowledge.
If you have doubts about your ability to complete the job safely, then it’s always better to call for professional help rather than risk falling because of a loose roof tile.
At the extreme end of the scale, you could end up damaging your roof irreparably. Since a replacement roof costs around £4,500 on average, it pays to get aerial installation right the first time.
DIY TV Aerial Installation
If you wish to cut the costs of your TV aerial installation, you could consider doing it yourself.
Before the fitting, you need to make sure that you know exactly what type of aerial installation you want. To do this, you need to consider your location as this will help you determine the signal strength you need, as homeowners living in the countryside will need much more than anyone residing in the city centre.
The most common aerial installations are located outside on the roof or inside your home. Each aerial fitting is different, so you need to consider which one is best for you and whether you can fit it yourself.
Outdoor TV Aerial Installation
The most common fitting is an outdoor aerial installation, which is located on the roof. Take a look at this step-by-step guide which will help you understand the fitting process.
Invest in Safety Equipment
The first thing you need to do is make sure you are safe on the roof.
To start, you need to make sure you have a ladder that is the right height for your roof. If you do not have access to one, you can expect to pay at least £130 for a roof ladder.
You should also consider investing in a fall arrest kit, which can cost around £40. This includes a safety harness and a rope grab which will protect you when fitting the aerial.
Choose a Position
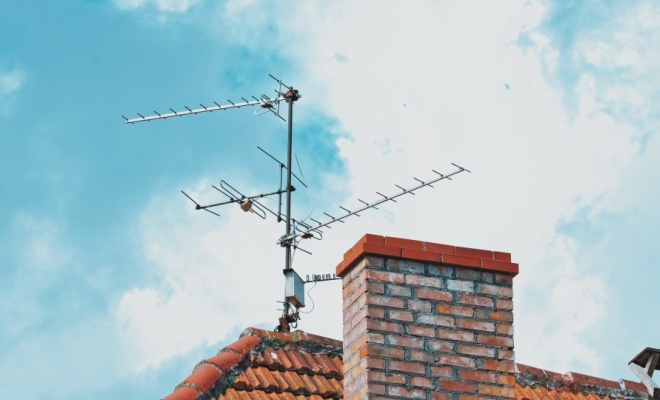
Before mounting an aerial in any spot on your roof, you should consider where you are going to get the best signal.
Typically, aerials that are placed on a gable wall or chimney are the easiest to install and also offer good reception.
If you are not sure, you should take a look at your neighbours’ aerials to establish the right position. If you have a hipped roof, you may face more difficulty, as fitting an aerial on a slope will take more time.
Securing Your Aerial
Once you’re sure the position is correct, you can drill into the centre of the wall.
You should then use a lashing kit, which will cost around £12 or more for a larger aerial.
To ensure your aerial is fitted properly, you should use alloy or steel masts and galvanised steel brackets, which altogether would come to an estimated total of £15.
These will all be fixed onto the brick along with the aerial and secured with wall plugs and screws which are priced at around £2 per bag.
Indoor TV Aerial Installation
An indoor aerial fitting is a much simpler process, all you need to do is follow these steps:
Plug Your Aerial in
To start, you need to plug your aerial cable into the back of your television or set-top set.
Getting a Signal
The majority of indoor aerials must be positioned to make sure that you are getting the best possible signal.
To ensure you are placing your aerial the right way, you should check to see the direction of your neighbours’ aerials and match yours to this.
Tune Your Aerial
If you have a new television, you may need to tune it in to access your local digital channels. If you find this difficult, you could tune it to another working television to establish the best position.
Positioning the Aerial
To ensure your aerial is positioned correctly, you should try switching to a Freeview channel such as the BBC. You can then start to move the aerial around to establish a connection.
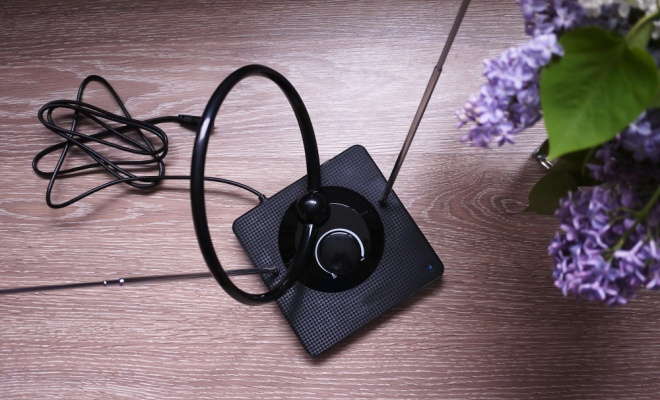
A great tip would be to place your aerial at head height near a window. If this is a significant distance from your TV, you may need to purchase extension leads which will cost around £3.
Connecting Your Aerial
To establish a connection, you will require male and female connector cables which will accommodate the different connections. This will cost around £12 each for one cable with both components.
Securing Your Aerial
Some indoor aerials can be an eyesore, so you might want to think about where you want to store yours.
You can either have it wall-mounted, which will require a bracket for £13 or you could use adhesive velcro pads for £6. Both of these products will ensure your aerial stays in the right place to maintain good reception.
Choosing the Right Location for My Aerial
There are a number of factors you need to consider before choosing where you should place your TV aerial.
To start with you should think about where you live and what your current signal is like. If you live in the city centre and your signal is bad, all you need to do is look outside of your window at your neighbours’ homes and see which way their aerials are pointing.
If you live in the middle of nowhere, it may be trickier to determine where your local TV transmitter is. The good news is that there are now plenty of transmitter locator tools to help you point your aerial in the right direction.
For those who live in a new-build property, you will find that your aerial is located inside, usually in the attic.
The fitted aerial should be digitally advanced and should have a strong signal but if not, you may want to call out a professional who can either fix your signalling issues or install a completely new aerial that will benefit you more.
How to Mount an Aerial
There are numerous ways to mount a TV antenna and the method you choose will usually depend on the type of aerial you have.
For an outdoor aerial, you will need to consider what type of roof you have, as this will allow you to decide where the aerial will be fitted.
One of the most common ways to fit an outdoor aerial is by mounting it on a chimney, as this is usually the highest point in your home.
If you do not have a chimney, then whoever you hire will suggest attaching it to a gable wall or fascia board.
At this point, it's worth asking whether you need your fascias painting as this will be more difficult once the aerial is attached. Fascia and soffits painting prices generally range between £700 and £1,000, so it could add some expense to the job.
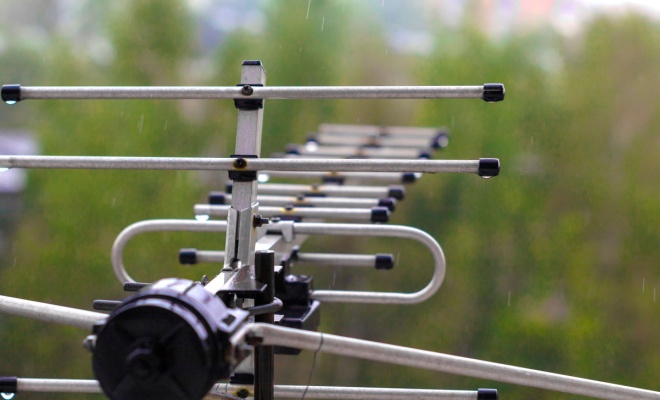
The mounting process involves securing the aerial by attaching brackets to the rooftop using screws. Before bolting the aerial down, the aerial engineer will ensure that any obstructions are out of sight, which will prevent any signal interruptions.
For an indoor antenna, you can choose to mount it on a wall, although this may involve some strategic thinking, as you will have to test the signal strength by moving the aerial around.
When installing the indoor aerial, the specialist will make sure that it is not located near any metal, so they will avoid mounting it near a window with metal bars or any other metal materials.
Choosing the Right TV Aerial
The first thing you should do before choosing your TV aerial is find out where the nearest local TV transmission is located.
If you live in a central area, you will have access to numerous signal sources, which will offer you some flexibility when choosing an aerial.
In high-signal areas, you can use indoor aerials, which are much easier to install. They will also last longer, as they are not exposed to the weather like rooftop aerials.
For those who live off the beaten track, your options may be limited.
More than likely, an aerial specialist will advise you to select an outdoor TV aerial, such as a high gain wideband aerial. This will offer excellent signal strength while also covering all channels available, so you have unlimited programme options.
Outdoor TV Aerial vs Loft TV Aerial
Let's take a look at the pros and cons of installing a TV aerial on the outside of your property versus inside your property in the attic.
Pros and Cons of an Outdoor TV Aerial
Outdoor TV aerials still remain one of the most popular types of TV aerials in the UK, as they give homeowners the best possible TV signal.
To help you decide if this type of aerial is right for your property, take a look at the pros and cons.
Pros
✔ High-quality TV signal.
✔ Works in low-signal areas.
✔ Unlimited access to multi-channels.
Cons
✖ Susceptible to bad weather.
✖ More expensive than fitting an aerial in the attic.
✖ Complicated and time-consuming installation.
Pros and Cons of a Loft TV Aerial
Loft TV aerials aren't as commonplace but are an attractive option if you live in an area which has a strong TV signal.
Not only are they more affordable to install (as it's easier and quicker for a tradesperson to do), but they're also hidden from view (in the attic).
There are a couple of issues to consider before committing to a loft aerial installation.
First, if your loft has been insulated, it's possible that TV aerial fitting could disturb the insulation or that the insulation could stop the signal from getting through. As the typical loft insulation cost can be much higher than an aerial installation, it's best not to interfere with existing insulation.
Access to the loft could also be a problem, and you may need to install a hatch and ladder to aid access to the loft. The loft hatch installation cost can range from £160 to £955, so it could be a significant outlay. However, it will provide easier access to the loft in future.
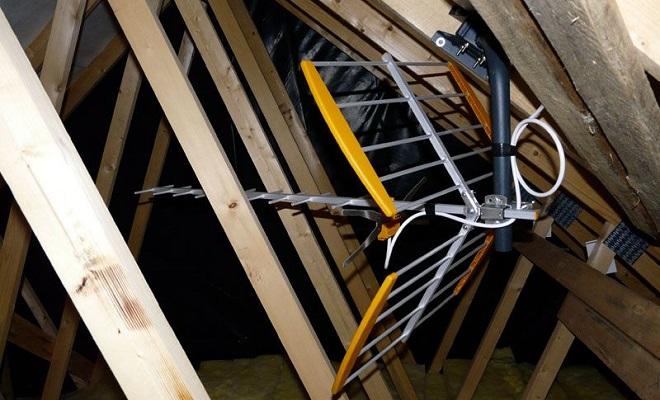
Here are some of the pros and cons that come with having a loft TV aerial installed.
Pros
✔ More feasible as a DIY project, as the process is quite simple.
✔ More affordable than installing a TV aerial outside.
✔ Easier to move, adjust, and troubleshoot issues.
Cons
✖ Doesn't work well in low-signal areas.
✖ Reception interference through concrete walls.
✖ Impulse noise issues can break up the picture.
Testing TV Aerials
If you are having trouble with your TV signal, there are some steps you can take to ensure that it is working.
Disconnect your coaxial cable from your television.
Plug the aerial’s F connector to the signal metre marked TV.
Turn the signal meter on and find the lowest broadcast channel in your local area.
Rotate the antenna 360 degrees - stopping at the highest signal strength.
Read and record the direction of the highest signal using a compass and repeat this for each channel.
Use your rotor to determine the best direction. If you do not have a rotor, use a compass to calculate it instead.
If you've gone through all of the steps above and you're still having issues, then it's advisable to find an aerial engineer who can identify the problem.
The cost of a TV aerial repair is around £40, but the exact cost will depend on the type of issue that you're having and how long it takes them to resolve the issue. If it's a minor issue, then they might be able to fix it on the spot for a much lower cost.
However, sometimes there's a critical issue with your system that can't be resolved, or that would take some time to deal with. In these cases, it can be more cost-effective to replace your TV aerial system than spending the time to fix an existing system.
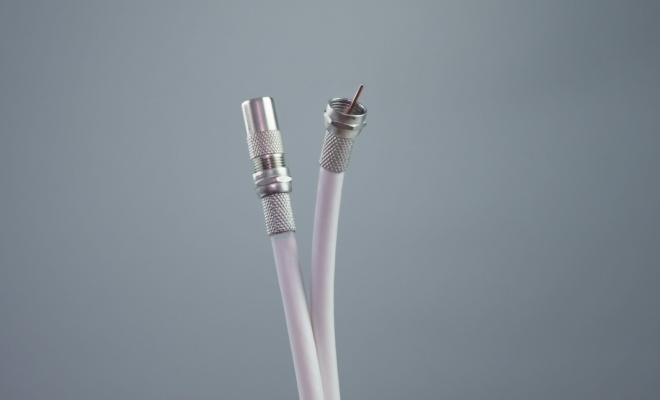
How to Join Aerial Cables
If you require a longer coaxial cable or need to re-route your cable elsewhere, then you will need to join the cables together. Here is a step-by-step guide which will help you get this task right.
To start, you need to make a small round incision about half an inch away from the outer layer of the cable using a utility knife or a coaxial stripping tool which costs around £18.
Remove the cut cable to reveal the cable screen and braid, then fold the cable braid back over the outside layer.
If you have a double screen cable you will need to cut the cable screen to show the internal dielectric material. This should then be sliced making sure to leave 3mm of insulation.
The F plug should then be screwed in over the top of the cable braid. Continue to screw it in until the dielectric is in line with the inside of the threaded part of the plug. This should leave you with 2mm of the centre conductor.
If there is any material left over 2mm then this will need to be cut.
All of the above steps should be repeated on the other side of the coaxial cable.
Once all the cutting is complete, the barrel connector should then be screwed and tightened into the F connectors.
How to Get Rid of TV Interference
If you have any issues with interference that affects the audio or image on your television, you should take the following steps:
Check to see if the audio and video cable connection is inserted properly.
Remove any metal objects or wireless devices, such as mobile phones or radios away from your television, as this may interfere with your TV signal.
Attach your TV aerial to an amplifier which should then be hooked up to your TV to boost the power of the antenna. A typical amplifier is worth around £25 which is definitely worthwhile to avoid interference.
Do Set Top Aerials Work?
A set-top aerial is a device that can be placed right next to your TV. For it to work, you need to live in an area that has significantly high signal levels.
Despite the increase in signal strength, set top aerials are still susceptible to interference, as the walls of your home get in the way. There is also less choice with indoor aerials, as you have limited channel options.
Diplexers and Splitters
If the signal strength in your home is low, an aerial specialist may suggest the installation of a diplexer, splitter or combiner to boost your TV aerial's effectiveness.
Here is a breakdown of what diplexers, splitters and combiners are, what they do and how much they cost.
| Type | Price | Function |
|---|---|---|
| Diplexer | £8 – £25 | Takes 2 signals and omits 1 signal out. Multiple devices while maintaining high signal. |
| Splitter | £3 – £20 | Takes 1 signal and outputs 2 signals. Used to add an extra TV to a current cable. |
| Combiner | £4 – £30 | Takes 2 signals and inputs them into 1. Adds antenna signal to an existing cable. |
Landlord Responsibility for TV Aerials
In the majority of cases, landlords are not responsible for installing, replacing or repairing your TV aerial. There is also no mention of it within the Landlord and Tenant Act, which therefore means neither the landlord nor the tenant is responsible for the upkeep or repair of TV aerials.
This is not to say that some landlords don’t include it in their tenancy agreement.
To determine who is responsible, your best option would be to contact your landlord and ask whether they deal with TV aerials and if not, you can start to look into a professional installation yourself.
Long-Distance TV Reception
TV antennas can reach up to 70 miles, so if you are looking for long-distance TV reception then your best bet is to invest in a long-range antenna which will reach around 50 to 70 miles.
To achieve long-distance TV reception, you will need to have your aerial installed outside.
If you already have an exterior aerial, then you may want to move it higher to get the best signal possible.
You could also consider replacing your current aerial with a tower-mounted aerial, which will help to remove interference, as well as increase the amount of channels you have access to.
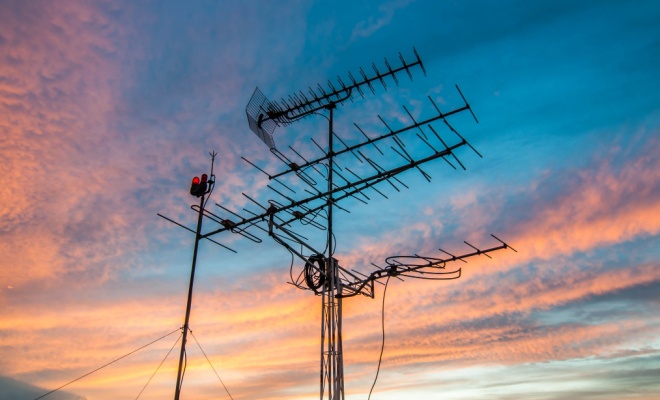
You could also consider stack antennas to improve your reception.
There are two types, one is known as stacking, which is when the aerials are placed vertically on top of each other. The other method is baying which is when the antennas are installed side by side.
Aerial Amplifier Cost
TV aerial amplifiers are designed to input signal, which results in a stronger signal being released. There are also some amplifiers that are made to split signals for homes with multiple televisions.
Aerial amplifiers cost around £30 to £70 depending on their function and how many outputs they have.
An installer will include this in their installation price, which will involve the following steps:
Plug the coaxial cable into coaxial in port on the amplifier.
Plug one end of the coaxial cable into the coaxial out port on the amplifier and one end into the antenna in the port of a power inverter.
Input a section of wire into the television out port on the power inverter and plug the opposite side into the splitter.
Attach the coaxial cable into the back of your television in the coaxial input and plug the other side into the splitter’s out port.
The inverter should then be plugged into the wall.
A low noise aerial amplifier is always worth trying for all poor reception areas. This works best when the amplifier is placed as close to the aerial on the mast as possible. This is a more expensive option, however, as these amplifiers typically need a separate power.
Satellite Dish Installation Cost
If you want to switch from traditional cable TV, you could consider having a satellite dish installed outside your home.
The main difference between a satellite dish and a TV aerial is that the first option is much easier to install.
Despite this, it is actually more expensive to have a satellite dish installed.
The estimated cost of this is around £150, although this will depend on the type of roof you have and how long the job will take. You also need to take into consideration the price of a satellite receiver, which is around £99.
You could always consider installing it yourself, with satellite dish kits priced at about £40. You will have to include other supply costs, such as safety equipment, brackets, coaxial cable, hinges and poles — which may end up costing you more than a professional installation.
TV Aerial Removal Cost
Considering taking down your TV aerial?
If you have an aerial that you're no longer using to watch TV, then you might want to consider getting it removed.
This will not only improve the aesthetics of your home but also eliminate any chance that it falls off in bad weather and causes damage to nearby property.
The average TV aerial removal cost is between £50 and £100.
The exact cost will depend on the type of aerial you have, how accessible your roof is, and your location in the UK. In particular, the cost of removing a TV aerial could be a bit higher if you have a complex system which takes more time for a professional to remove.
FAQs
This may necessitate the purchase and installation of an amplifier. A new coaxial cable will need to be installed from the new splitter or amplifier to the new outlet, which can be run externally or internally.
This new cable is then connected to a surface-mounted or flush television aerial outlet. The cost of having a second socket fitted by a professional aerial installer is normally less than £100 — as long as there are no access problems.
However, loft aerials are not recommended if the alignment is such that the aerial is looking through a gable wall, as this will have a considerable impact on the signal strength. You also need to place the aerial well away from any metalwork or wiring, which makes them unsuitable if you have a metal roof.
Roof-mounted aerials are more expensive to fit (as they require roof access), but they usually offer the best performance.
If the aerials are mounted on a gable wall or a chimney stack adjacent to a wall, then they should be straightforward for a professional to install. However, mounting on a central chimney in the middle of a steep roof can be more of a challenge. You also need to pay attention to the wind loading. When exposed to strong winds, big aerials can put significant strain on fixtures if they're not secured well, and snap poles that are too long or thin.
Small set-top aerials can be an option in areas of particularly good TV reception — but they vary from poor to absolutely useless in most areas. In strong signal locations, however, they are a fantastic option — with minimal cost, no installation required, and easy portability.
The first thing to try is a tall mast, as raising the height of an aerial can significantly improve the reception that you get by avoiding all line-of-sight obstacles. However, using a tall mast will require additional fixings so it stays safely secured to your property. This is because the aerial will be exposed more to the wind, which will put much more stress on fixtures.
If a taller mast is not possible, the next best option is to use multiple aerials in an array to provide greater output. However, this option requires expert knowledge of aerials plus specialist test equipment. If you are taking the DIY route, the simplest form is just two aerials ensuring that the cable feed from each aerial to the combiner unit is exactly equal in length.
If you have an aerial fitted on the outside of your property, then it will get more wear and tear than a loft aerial, as it's exposed to the weather. This can be a particular concern if the area where you're located gets strong winds (such as by the coast). If having a loft aerial isn't an option for you, invest in a durable aerial and have it fitted professionally.
When it's feasible, this is why modern properties are now fitted with indoor aerials — as the weather does not impact them, which means they'll last much longer before needing to be replaced.
If your TV aerial does break or you experience any signal faults, you can always employ an aerial professional to come out and perform any repairs you need. An aerial repair would cost around £40.
The expense is lower, as there is no need for the installer to climb up the side of your house and onto the roof. This saves a significant amount of time — which translates into cost savings for you.
But if you live in a remote area, then a roof aerial will likely be a more suitable choice that gives you the best TV signal possible.
There are various types of aerials. High gain aerials are one of the most popular options, which cost between £20 and £45 and give you the highest signal access possible. The most common high gain aerials are wideband aerials, which cover all signal channels for digital TV — so are perfect for any location in the UK.
It's true, however, that demand for streaming services means that households don't need an aerial as much as they did in previous decades.
If you're concerned about your aerial being affected by weather, ensure it's been installed as securely as possible.
Sources
https://www.bbc.co.uk/reception/check-for-transmitter-faults/#/undefined
https://www.bbc.co.uk/reception/help-guides/freeview/what-type-of-aerial-do-i-need
https://www.bbc.co.uk/reception/help-guides/freeview/who-is-responsible-for-my-sharedcommunal-aerial
https://www.techwalla.com/articles/trouble-with-a-panasonic-cinema-vision-hdtv
https://www.smartaerials.co.uk/blog/different-types-of-tv-aerials-antennas-for-tv-radio
https://aerialsdirect.co.uk/loft-aerials-your-complete-guide/
https://www.wilsonamplifiers.com/blog/understanding-coaxial-cables-the-complete-guide/


